When we first choose the path to record in home recording studio, we make some mistakes. Those mistakes are not new. The experts even did face them as well at their beginning. The results are like – though you have every setup, somehow, the sound isn’t as good as you expected. It’s not that your gear is bad; it’s that small mistakes are quietly lowering your quality.
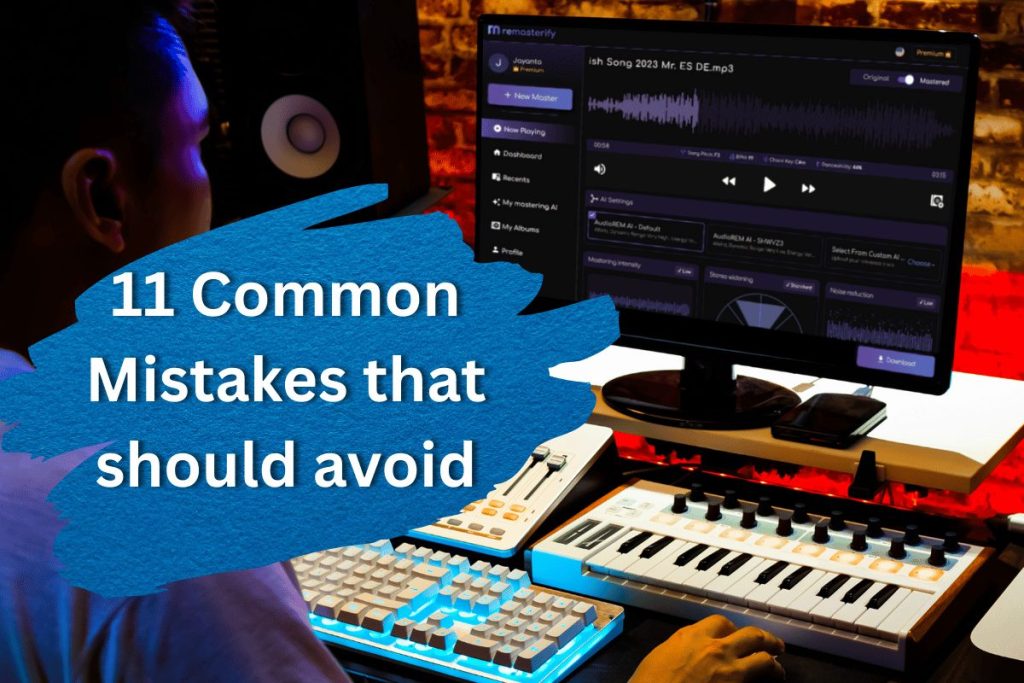
Remasterify experts enlisted all those issues, and found solutions for the beginners who are starting their recording journey. I’ll walk you through 11 common recording problems, show you how they happen, and give you simple ways to fix them.
Table of Contents:
Recording in a Bare, Echoey Room
Turning the input level up too high
Putting the mic in the wrong place
Using the wrong mic for the job
Playing the backing track through speakers while recording
Recording without a Pop Filter
Adding too many effects while recording
1. Recording in a Bare, Echoey Room
Recording in a room with hard walls, floors, and windows can make the sound bounce around. The microphone doesn’t just hear your voice or instrument. It also hears all those reflections. The result is a boomy sound, almost like recording in a bathroom.
How to fix it:
- Add soft materials in the room: rugs, curtains, blankets, or cushions.
- Hang a thick blanket or duvet behind you while recording.
- Face a closet full of clothes and put the mic in front of it.
- Avoid standing in corners, where bass can build up and make the sound muddy.
2. Turning the input level up too high
When the gain is turned up too much on your audio interface, the recording level looks big and loud on the screen. But loud parts will hit the maximum level and “clip”. That adds harsh distortion that can’t be removed later.
How to fix it:
- Keep average levels around halfway up the meter in your DAW.
- Make sure peaks never go above -6 dB.
- Adjust the gain on your audio interface, not just the volume in the software.
- Do a short test recording and listen back before recording the full take.
3. Putting the mic in the wrong place
Placing the mic too close can cause loud bursts of air from “p” and “b” sounds. It can also make the recording too bass-heavy because of something called the proximity effect. On the other hand, placing it too far away makes the sound thin and invites too much room echo.
How to fix it:
- Keep the mic about 6–12 inches away for recording a vocal.

- Always use a pop filter to stop plosives.
- Angle the mic slightly so your breath isn’t hitting it straight on.
- Test different distances and positions to find the clearest sound.
4. Using the wrong mic for the job
Some microphones are made for loud sounds and live stages, while others are built to pick up every small detail in a quiet space. That’s why you’ve to understand what you require. You’re using a stage mic, and expecting a soft, detailed recordings; that’s entirely wrong path.
How to fix it:
- Use a large-diaphragm condenser mic for vocals and acoustic instruments in a quiet, treated space.
- If you’re using mic for vocal, choose the best mic with expert advice.
- Use a dynamic mic for loud sources like guitar amps or drums, or in noisy rooms.
- If you only have one mic, learn its strengths and choose sources it captures best.
If you are confused to choose the right mic, read this article >
5. Playing the backing track through speakers while recording
When the instrumental or backing track is played through speakers during recording, the microphone picks it up along with the main sound. Later, this can cause mixing problems, strange echoes, or phase issues.
How to fix it:
- Use closed-back headphones while recording to keep sound from leaking out.
- Keep the headphone volume just high enough to hear clearly.
- If recording with one ear uncovered, turn the open ear away from the microphone.
6. Ignoring Gain Staging
If the signal is too quiet when it enters the audio interface, you might turn it up later in the DAW. This makes all the noise from the room, the mic, and the cables louder too. If it’s too loud at the start, it can distort. Both problems make mixing harder.
How to fix it:
- Adjust the gain so the signal is strong but not close to clipping.
- Watch the meters accurately. Aim for peaks around -6 dB.
- Keep levels balanced at each stage: Mic → Interface → DAW.

7. Recording without a Pop Filter
Strong bursts of air from certain words can hit the microphone capsule, if you’re not using a pop filter. This creates a sudden low-frequency thump that can ruin an otherwise good take.
How to fix it:
- Always use a pop filter for vocals, even if it’s a budget one.
- Place it about 2–3 inches in front of the mic.
- Keep your mouth 3–4 inches from the pop filter for best results.
8. Adding too many effects while recording
Applying heavy reverb, compression, or equalization during recording might sound nice in your headphones. But once it’s recorded, you can’t remove those effects. If the settings aren’t right, you’re stuck with them.
How to fix it:
- Record clean; don’t use any heavy effect.
- Add EQ, compression, and reverb, where you can tweak or remove them later. You will get each of these from Remasterify.
- If you want to hear effects while recording, use monitoring effects that don’t get recorded into the track.
9. Not Backing up Your Projects
This is a very basic mistake beginners do at their primary practices. You don’t know when a computer crash, power cut, or file error can occur and instantly erase hours of work. Without a backup, you have to start over from scratch.
How to fix it:
- Save your work regularly.
- Keep a copy on an external drive or cloud storage.
- Use “Save As” to create dated versions of your project in case you need to go back to an earlier edit.
10. Skipping Test Recordings
Jumping straight into a full performance without checking levels, mic position, or background noise can lead to wasted takes. You might only notice a buzzing sound or room echo after you’ve finished.
How to fix it:
- Record a short sample first.
- Listen with headphones to check for distortion, noise, or poor tone.
- Adjust setup before recording the full take.
11. Messy Cable Setup
This is the worst case that can happen to you, if you’re not mindful of management. Loose or tangled cables can pull on equipment, create hum or buzz, and make it harder to work. In some cases, moving cables can cause crackling sounds during a recording.
How to fix it:
- Keep cables neatly coiled. Make sure, those are away from power cables where possible.
- Use cable ties or Velcro straps to organize them.
- Check connections before recording to avoid noise.
Conclusion
Before your next session, go through each point in this list like a checklist. Treat your space to reduce echo, set levels carefully, and place the mic where it captures the cleanest sound. Use the right mic, monitor with headphones, and keep your setup tidy. Record clean, back up often, and always run a quick test. These small habits turn home recordings from “just okay” to clear, balanced, and ready for mixing.
Frequently Asked Questions
You may ask these questions in your mind, but answers from random people won’t satisfy you. So, Remasterify experts answers here:
1. How can I make my home recordings sound more professional?
You don’t need expensive gear to improve your sound. Focus on your room first, reduce echo with rugs, curtains, or blankets. Place your mic at the right distance (6–12 inches for vocals) and use a pop filter. Set gain so peaks stay around -6 dB, and record clean without heavy effects. Use closed-back headphones to avoid sound leaking into the mic. Small changes like these make a big difference in clarity and quality.
2. What is the best mic position for recording vocals at home?
For most voices, the best starting point is placing the mic 6–12 inches from your mouth with a pop filter in between. Keep the mic slightly off-center so air from “p” and “b” sounds doesn’t hit it directly. Adjust the distance based on your tone, closer for warmth, farther for a natural sound. Always test by recording a short sample and listening back to see what works for your voice and your room. Read More.
3. Why is my recording distorted even though it’s not loud?
Distortion isn’t just about volume, it’s often caused by gain being set too high on your audio interface. If your signal is clipping before it even reaches your DAW, lowering the track volume in software won’t fix it. Make sure peaks on your input meter stay below -6 dB and average levels are around halfway. If it’s still distorted, check cables, mic placement, and whether effects or plugins are adding extra gain.
4. Should I use effects like reverb or compression while recording?
It’s best to record clean and add effects later during mixing. If you add reverb or compression while recording, they become part of the track and can’t be fully removed if you change your mind. You can still use “monitoring” effects so you hear them in your headphones without actually recording them. This gives you the freedom to adjust settings later and keeps your original take clear and flexible for mixing.
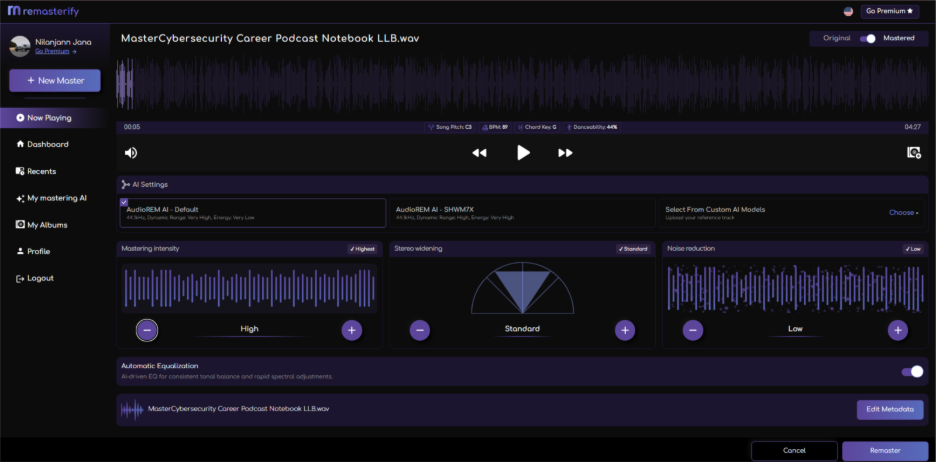
5. Do I need to master my home recordings, and how can I do it easily?
Yes. Mastering is the final step that balances your track, makes it loud enough, and ensures it sounds good on all devices. Even if your recording is clean, mastering can fix tonal issues, control peaks, and add polish. If you don’t have mastering gear or experience, you can use Remasterify, an AI-powered mastering tool. Just upload your track, choose your settings, and it delivers a ready-to-release master in minutes without needing expert skills.