If you work with recorded audio, whether it’s film, music, podcasts, or voiceovers, you’ve probably heard about room tone and background noise. These two are easy to confuse. But they behave very differently in a mix. In this blog, we’ll explain what they are, how they affect the entire audio, how to spot them in your recordings, and how to use audio mastering as a solution.
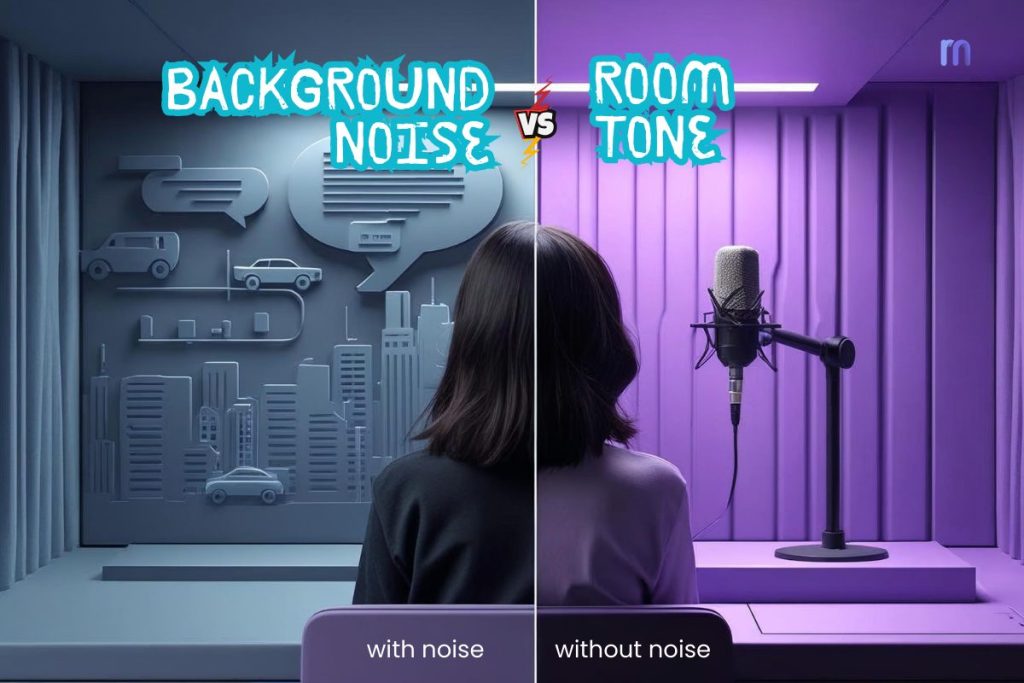
Table of Contents
Common Mixing Problems They Cause
How These Issues Show Up in Podcasts, Films, and Music
Fixing and Preventing the Problems
How to Identify Room Tone and Background Noise
What Is Room Tone?
Room tone is the subtle sound that naturally exists in a room when no one is speaking or moving. It’s the quiet hum, air movement, or electronic buzz in space.

Room tone is very common, hard to recognize
On film sets, the crew often says, “Hold for room tone.” Everyone goes quiet, and they record 30–60 seconds of the empty space. That becomes a reference background for the scene. The same concept applies in podcasting, voiceovers, or music when you want to keep a consistent background behind the main audio.
What Is Background Noise?

Types of Background noise
Background noise refers to unwanted sounds that accidentally sneak into your recording. This could be dogs barking outside, a neighbor mowing the lawn, or the buzz of a refrigerator. These noises are not part of your intended audio and often distract from the listener’s focus.
How Are They Different?
| Feature | Room Tone | Background Noise |
| What it is | Natural ambient sound in a quiet room | Unwanted sound from the environment or equipment |
| When it appears | Always present in silent parts of a recording | Randomly during takes, often accidental |
| Sound type | Soft, steady, and low in volume | Loud, irregular, and distracting |
| Examples | AC hum, light buzz, quiet air | Dog barking, car honks, keyboard clicks |
| Purpose in mixing | Fills gaps, blends edits, keeps mix natural | Needs to be removed or reduced |
| Should it stay? | Yes, if clean and consistent | No, unless used intentionally |
Room tone helps you fill gaps between phrases or cuts. Without it, those gaps may sound unnatural, like a hole in the audio. Background noise, on the other hand, clutters your mix and makes it harder for listeners to focus on the actual content.
Common Mixing Problems They Cause
Both room tone and background noise can cause issues in your mix if not handled properly. Some of these problems are small but noticeable. Others can ruin the flow of a scene or a song. Here’s what to watch for while editing and mixing.
Gaps and Sudden Silences
Let’s say you cut out a mistake in your voice recording. If you don’t fill that space with room tone, the result is a sudden and unnatural silence. Even a casual listener can tell that something was removed. Room tone helps make the edit seamless and less noticeable.
Noise Build-up in the Mix
Background noise may not seem like a big deal at first. But if you have it on multiple tracks, say vocals, instruments, and ambience, it adds up. In the final mix, the audio may sound muddy, hissy, or overly busy. The careful task of background noise removal early helps keep your mix clean.
Mismatched Audio in Dialogue or Music
Let’s say you record part of a podcast in a studio and another part at home. Or you re-record a line of dialogue (ADR) later. If the room tones in each location are different, listeners will hear the change immediately, even if your performance is the same. Matching room tone helps blend it all together.
In music, recording vocals in different rooms can cause inconsistent background layers between verses and choruses. That makes the track feel uneven.
Listener Fatigue from Inconsistent Background
Subtle shifts in background can wear out your listener’s ears, even if they can’t explain why. Our brains expect a consistent environment. When the sound keeps changing, it takes more effort to process. That’s called listener fatigue, and it’s one of the reasons why room tone matters.
How These Issues Show Up in Podcasts, Films, and Music

| In Podcasts | In Films | In Music |
| Editing out filler words without filling gaps can make it sound like the speaker is jumping. | A poorly placed ADR line without proper room tone feels detached from the scene. | A quiet section with mismatched background can make a breakdown or bridge feel disconnected. |
How to Identify Room Tone and Background Noise
It’s not always obvious where background noise starts or where room tone ends. To fix things, you first have to hear them clearly. This section will help you train your ears, and your eyes, to spot issues in your mix more easily. audio engineering executives can help you in this case.
What to Listen for in Your Mix
Room tone is steady and quiet. It blends into the background and doesn’t pull attention. Background noise is unpredictable. It jumps out, like a door slam or chair squeak. When reviewing your mix, pause at silent parts. If the space feels too “dead” or suddenly changes, that’s something to fix.
Using Headphones vs Studio Monitors
Both tools have value. Headphones help you spot fine, hidden sounds, like hums, buzzes, or clicks. Monitors let you hear how the whole mix feels in space. Use both when checking edits and switching between them regularly.
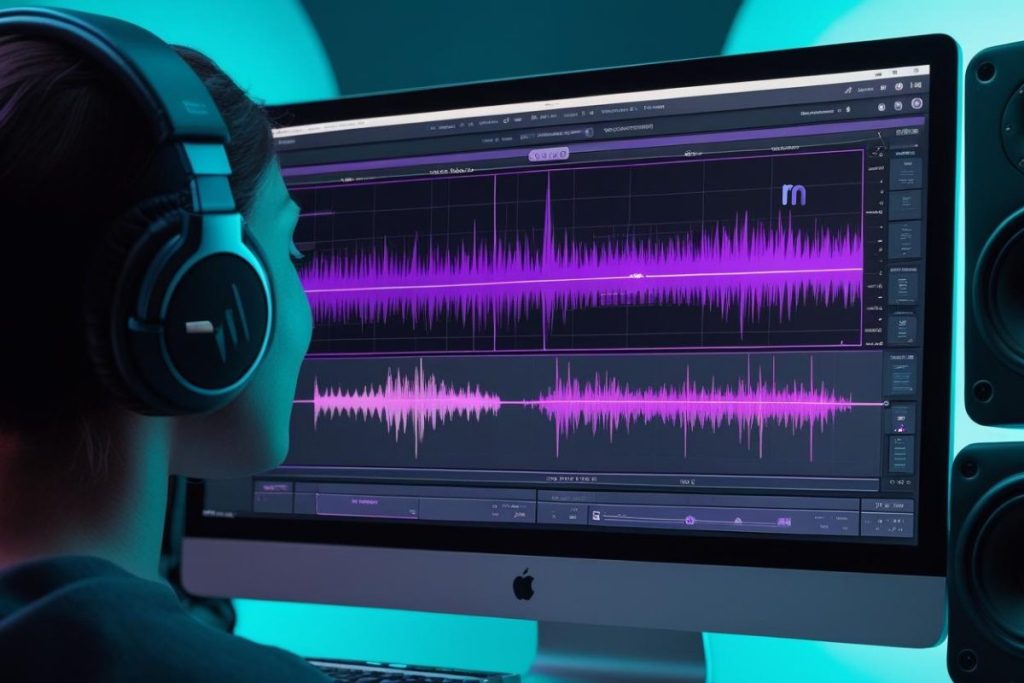
Spectral View in Your DAW
Most modern DAWs (like Reaper, Audacity, or Pro Tools) let you view audio as a spectrum. In this view, room tone appears as a soft, consistent pattern. Background noise shows up as sharp spikes or bursts. This helps you visually separate the two and make better editing decisions. Other you can use online audio noise reduction tools.
Real Examples from Film, Podcast, and Home Recording
- A film editor inserts replacement dialogue (ADR). Without room tone under it, it sounds like it was recorded in a totally different space.
- In a podcast, one guest sounds warm and natural, the other sounds echoey and sterile, because the room tone doesn’t match.
- In home recordings, you might fix a vocal mistake with a re-recorded line, but without room tone underneath, the gap sounds obvious.
How Room Tone Sounds vs Random Noise
Room tone is like a gentle bed of sound. It feels neutral and calming. Background noise is disruptive and sharp. You’ll know something’s off when the sound pulls your attention away from the voice or music.
Understanding Consistency and Placement
Room tone should be the same throughout the recording session. Use the same mic, position, and gain. If you move the mic or change location, the tone will change. That creates mismatches you’ll have to fix later.
Fixing and Preventing the Problems
Once you can hear the difference, it’s time to fix the issues and prevent them from happening again. Whether you’re recording new material or cleaning up old tracks, the right habits and tools make a big difference. Let’s look at how to manage both room tone and background noise effectively.
How to Record Proper Room Tone
After a take, ask everyone to stay silent for 30 seconds. Keep all gear on. Record using the same mic, settings, and placement as before. This gives you a matching room tone to use during editing. It’s a simple habit that saves hours later.
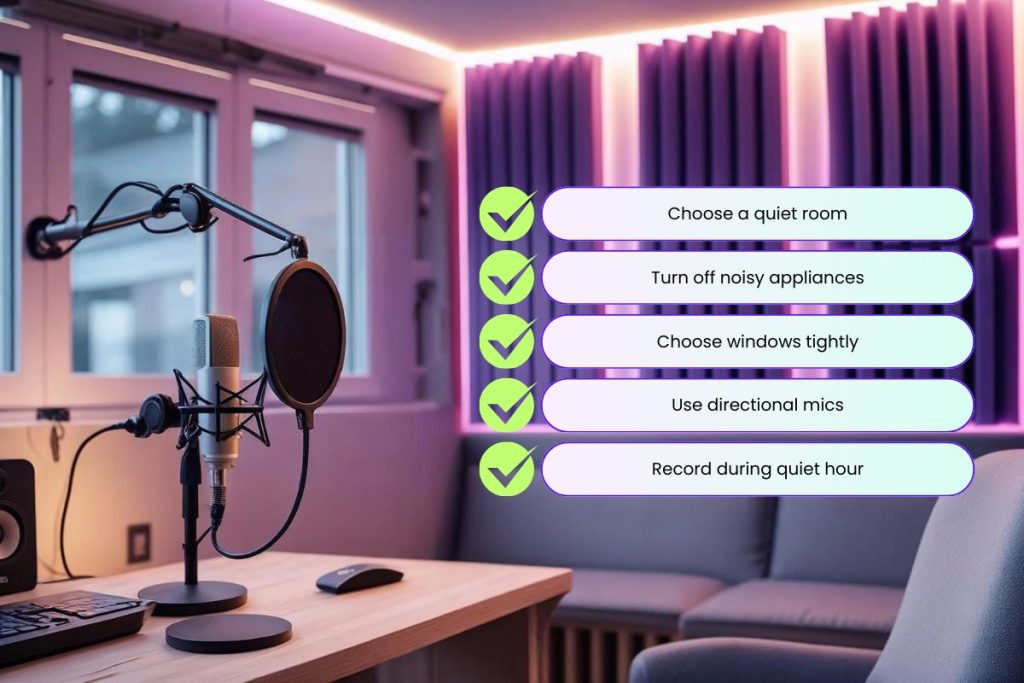
Tips to Avoid Background Noise at Source
Remasterify to Handle Room Tone & Noise Issues
If you missed recording room tone or your mix has audio distractions and background noise issues, Remasterify can help smooth out these problems. When you upload your audio, Remasterify analyzes the background, detects noise patterns, and adjusts the ambience naturally, without removing the life from your sound.
Its AI-powered mastering process balances tonal consistency and dynamic range. So, your quiet moments feel intentional, not broken. Room tone mismatches, silent gaps, and uneven ambience are automatically corrected as part of the mastering output. You don’t need (though you can do) to do any manual adjustments or noise profiling. Just upload, preview, and tweak intensity or stereo width if needed.
Whether you’re editing dialogue, a music track, or a podcast, Remasterify helps create a clean, natural-sounding background that blends with your main content.
Use Noise Reduction Tools Wisely
Instead of manually cleaning out harsh background noises, let Remasterify take care of it during mastering. Its built-in noise control keeps your audio smooth without flattening the voice or instruments. You won’t need to worry about overprocessing, since it’s already optimized for voice clarity and ambient balance.
If you’re dealing with light background issues, use Remasterify’s default settings. For heavier cases, try adjusting the noise reduction intensity slider before exporting the final master.
Can Mastering Fix These Issues?
Yes, if you’re using the right mastering tool. Remasterify is built to handle real-world problems like noise buildup, room tone mismatch, and uneven dialogue takes. Instead of just boosting your audio, it intelligently restores balance and removes harsh distractions.
Still, it’s better to record in clean conditions when possible. But if you couldn’t, Remasterify online audio mastering gives you a reliable way to clean up the mix without needing deep technical skills.
Basic Workflow to Maintain Clean Backgrounds

Final Thoughts
Room tone and background noise should always be part of your editing checklist, not as technical terms, but as practical elements that shape how clean and natural your mix feels. Before you export anything, ask: are there any gaps that sound too empty? Is there any noise pulling focus from the content? If yes, fix it early. Whether you’re working on music, podcasts, or dialogue, managing the background is just as important as capturing the main sound.
Up next, we’ve answered common questions about handling these issues in different scenarios.
Frequently Asked Questions
1. Why is there noise in my audio?
Noise usually comes from your environment, equipment, or power sources. Common causes include fans, AC, electrical interference, cheap cables, or mic handling. Even quiet rooms have subtle background sounds. If you don’t use proper mic placement or a clean recording space, these noises can sneak in. Always record in a quiet room, use good cables, and check your gear before starting.
2. What is room tone in audio recording?
Room tone is the natural sound in a space when no one is speaking or moving. It’s not silence; it’s the soft hum, air, or background presence that your mic still picks up. Room tone helps keep your audio edits smooth and consistent. Without it, cuts in your recordings can sound fake or jumpy. Recording 30 seconds of room tone helps during editing or mixing.
3. How to remove buzzing noise from audio?
Buzzing often comes from electrical issues or interference. To remove it, you can use noise reduction software or online tools that analyze and remove steady hums. If you want a faster way, upload your track to Remasterify, which automatically detects and cleans buzzing, hums, and background sounds during mastering. Always try to fix buzzing at the source before recording.
4. How to fix audio that sounds different in parts?
If your audio sounds different in different parts, it’s likely due to changes in room tone or background noise. To fix it, you can blend room tone under the edited sections or use automated mastering tools like Remasterify. It evens out tonal differences by mastering audio tracks and makes your full track sound like one consistent take. Try to always record with the same mic, in the same room.
5. Can mastering remove background noise?
Yes, but only if the mastering tool includes noise control features. Remasterify is an online mastering tool that reduces background noise, balances room tone, and fixes harsh transitions automatically. Traditional mastering won’t fix messy recordings, so it’s better to clean noise early. However, if you’re already finished recording, mastering with built-in cleanup features is your next best option.
6. How to remove noise from audio online for free?
If you want to clean your audio quickly without installing software, try an online tool like Remasterify. Just upload your file, and the system automatically reduces background noise, balances levels, and prepares it for publishing. It’s especially useful for voice, music, or podcast audio. For best results, record clean audio to start with, but this is a great fix when needed.
7. How to tell if it’s room tone or background noise?
Room tone is soft, steady, and doesn’t pull attention. Background noise is loud, random, and distracting. If the sound is always there quietly between phrases, it’s room tone. If it suddenly appears, like a cough, car horn, or buzzing, it’s background noise. Play your audio in a quiet room with headphones. If something jumps out, it’s likely background noise, not room tone.