Ever finished a beat, only to realize it lacks the punch and clarity of professional tracks? Maybe it sounds great in your DAW but falls apart on streaming platforms or feels too quiet compared to commercial releases. If that sounds familiar, you’re not alone—mastering beats can be tricky.
Many producers struggle with inconsistent loudness, harsh frequencies, or a mix that just doesn’t translate well across different playback systems. And let’s be real—it can seem like some high-end studio secret.
But here’s the good news: It’s not. With the right techniques, you can take control of your beat mastering process and give your beats the polished, professional sound they deserve. In this guide, we’ll break it all down—no fluff, just actionable insights. Let’s dive in!

Table of Contents
- Understanding Mastering
- Preparing your mix for Beat Mastering
- Essential Beat Mastering Elements
- Practical Beat Mastering Tips
- Common Mistakes to avoid while Mastering Beats
- Need a Helping Hand? AI-Assisted Mastering tool can Help
Understanding Mastering
Mastering is the final step in music production—the process that gives your beat that professional, polished sound. It ensures your track sounds consistent, clear, and loud enough across all playback systems, whether it’s played on studio monitors, a car stereo, or earbuds.
Definition and Purpose
Unlike mixing, which focuses on balancing individual elements, mastering enhances the entire track as a whole. It involves subtle adjustments to EQ, compression, limiting, and stereo imaging to ensure your beat sounds refined and competitive. A well-mastered beat should:
- Maintain clarity and detail while keeping the dynamics intact.
- Be loud enough to match commercial tracks without sounding distorted.
- Have a balanced frequency spectrum with no harsh highs or muddy lows.
- Translate well across different playback systems.
Goals of Mastering
A well-mastered track does more than just sound good—it enhances the listener’s experience and ensures your music stands out in a competitive industry.
- Better Engagement & Retention
Chances are listeners engage and replay a song that sounds professional and immersive, increasing the chances of higher streams and shares.
- Market Readiness
Whether you’re licensing beats, sending demos to artists, or releasing music on platforms, a well-mastered beat ensures your work is ready for any commercial opportunity.
- Playback Versatility
A great master ensures the beat sounds just as good on a club sound system as it does on a phone or laptop, preserving quality across different devices.
Preparing your mix for Beat Mastering
Before you even think about mastering beats, your mix needs to be as polished as possible. As it isn’t about fixing a bad mix—it’s about enhancing an already great one. If your mix is unbalanced or muddy, mastering will only amplify those issues. Here’s what you need to focus on before sending your track to the mastering stage.
Achieving a Balanced Mix
A balanced mix means that all mastering process sit well together, creating a clear and professional sound. If your mix is muddy, harsh, or unbalanced, no amount of mastering can fix it. Here’s what you need to do:
- Clean up unnecessary frequencies
Too many frequencies stacking up in one range can make your mix muddy or piercing. Use EQ to clean up unwanted frequencies, especially in the low end.
- Check the Volume Levels
Every element should be clearly audible without overpowering others. The kick, snare, bass, and lead sounds should have proper volume balance.
- Leave Enough Headroom
Your mix should not be too loud—keep peaks around -6dB to allow space for further mastering adjustments.
- Maintain Dynamics
Your mix should feel alive. Over-compressing can make it sound flat and lifeless. Use compression wisely to control dynamics but preserve energy.
- Create Depth and Space
A great mix has a sense of depth. Use panning, reverb, and delay to create space between sounds and avoid clutter.
Critical Listening Before Mastering Beats
Before exporting your mix for beat mastering, take time to listen critically and identify any possible problems. Here’s how you can do that:
- Test on Different Playback Systems
Your mix might sound great in your studio monitors, but what about on a phone speaker, a car stereo, or headphones? Play your mix in different environments to ensure it sounds consistent across all devices. If your bass disappears in small speakers, you may need to adjust it.
- Use Reference Tracks
Compare your mix with a professional track in the same genre. Ask yourself:
- Does my track sound too quiet or too loud?
- Is my low end too weak or too overpowering?
- Are my highs harsh compared to the reference track?
This comparison helps you identify weaknesses in your mix before mastering beats.
- Listen at Different Volumes
If your track only sounds good when played loud, it’s not well balanced. Play it at a low volume—can you still hear the kick, snare, and bass clearly? If elements disappear, you may need to adjust your mix.
- Step Away and Take Breaks
Ear fatigue is real. When you listen to the same mix for too long, your ears adjust to its flaws. Take breaks and come back with fresh ears—you’ll notice things you might have missed before.
Final Check Before Mastering Beats
Once you’re happy with your mix, follow these final mastering process:
- Export your mix in high-quality WAV format (24-bit, 44.1kHz or higher).
- Remove any master bus effects like limiters or excessive compression to leave room for adjustments during mastering beats.
- Double-check for clicks, pops, or unwanted noises before finalizing the mix.
By properly preparing your mix, the mastering process can become smoother and more effective, ensuring that your final master sounds clear, powerful, and ready for release.
Essential Beat Mastering Elements
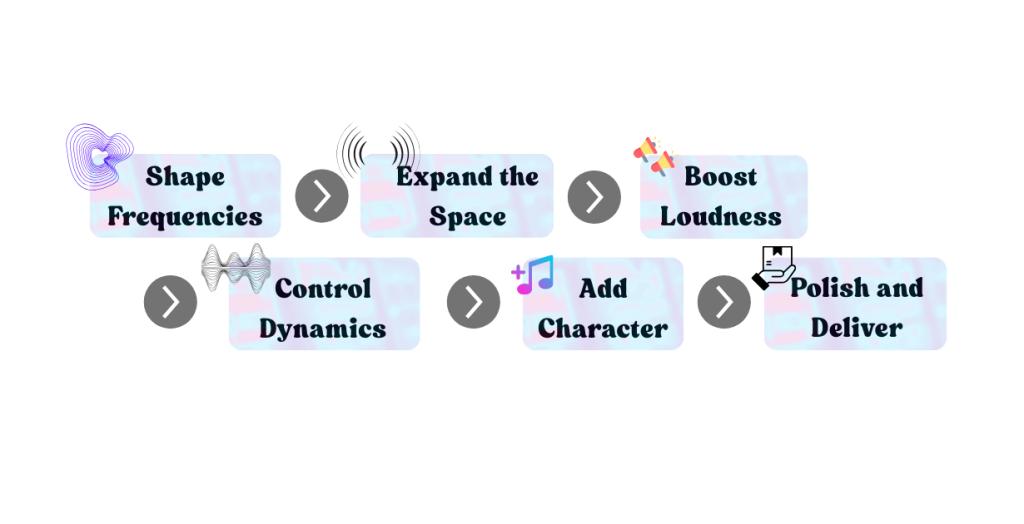
Beat Mastering is a step-by-step process. Each step builds on the last to create a clean, balanced, and professional sound. If done in the wrong order, it can cause problems instead of fixing them. Follow this order to make sure your beats sound their best.
Here’s a breakdown of each essential step and how to use them effectively.
Step 1: Equalization – Fixing Frequency Problems
EQ removes unwanted frequencies and helps each sound sit in its own space. This keeps the mix clean and balanced.
How to Use It:
- Cut unwanted low-end noise (20-30Hz): Use a high-pass filter to remove rumble.
- Fix muddiness (150Hz – 400Hz): If the mix sounds muddy, reduce this range by -2 to -4dB.
- Boost clarity (3kHz – 6kHz): A small boost here helps vocals and leads stand out.
- Add brightness (10kHz – 16kHz): A light boost adds air and openness to the track.
Paid tools:
- FabFilter Pro-Q 3 – A highly transparent, precise, and visual EQ with dynamic bands.
- DMG Audio Equilibrium – A powerful EQ with extreme customization.
Free tools:
- TDR Nova – A dynamic EQ that works great for fine adjustments.
- Voxengo Marvel GEQ – A graphic EQ with smooth frequency shaping.
Step 2: Compression – Controlling Volume Changes
#Image
Compression evens out loud and quiet parts, keeping the beat consistent and punchy.
How to Use It:
- Use light settings: Set a ratio of 1.5:1 – 2:1 with 1-3dB of gain reduction to avoid over-compressing.
- Adjust Attack & Release:
- Fast attack (1-10ms): Controls peaks but can kill punch if too fast.
- Slow attack (30ms-50ms): Keeps drums punchy and alive.
- Fast release (50ms-100ms): Adds energy.
- Slow release (200ms-500ms): Keeps a smooth, natural sound.
- Try Multi-Band Compression: If lows, mids, or highs need separate control, multi-band compression can balance them better.
Paid Tools:
- FabFilter Pro-C 2 – One of the most transparent and versatile compressors available.
- Waves SSL G-Master Buss Compressor – Great for gluing a mix together while keeping punch.
Free Tools:
- Melda MCompressor – Highly customizable with a smooth sound.
- TDR Kotelnikov – A transparent, mastering-grade compressor.
Step 3: Stereo Imaging – Making the Beat Sound Wide
#Image
Stereo imaging adds width and depth, making the track feel bigger. But too much widening can cause phase issues and make your mix sound weak in mono.
How to Use It:
- Widen the highs (above 6kHz): This makes the mix more spacious without affecting clarity.
- Keep the bass in mono (below 150Hz): This keeps the low end tight and powerful.
- Avoid extreme widening: A small boost (5-10%) adds width without ruining mono playback.
Paid Tools:
- iZotope Ozone Imager (Full Version) – Offers detailed stereo imaging control.
- Brainworx bx_stereomaker – Adds stereo width without phase issues.
Free Tools:
- A1StereoControl – Lets you widen the mix safely while keeping bass mono.
- iZotope Ozone Imager (Free Version) – A simplified but effective stereo-widening tool.
Step 4: Saturation – Adding Warmth and Energy
#Image
Digital mixes can sound too clean or sterile. Saturation adds warmth, color, and a more natural feel.
How to Use It:
- Warm up bass (below 200Hz): A small amount of tube saturation adds richness.
- Make mids stronger (500Hz – 2kHz): Tape-style saturation helps instruments stand out without harshness.
- Brighten highs (above 6kHz): A little exciter effect makes the mix crisp and clear.
Paid:
- FabFilter Saturn 2 – A versatile saturation and distortion tool with multiple modes.
- UAD Studer A800 Tape – Adds authentic analog warmth and tape saturation.
Free:
- Softube Saturation Knob – A one-knob solution for quick warmth.
- Variety of Sound FerricTDS – A tape-style saturator that adds analog feel.
Step 5: Limiting – Making the Track Loud Without Clipping
#Image
A limiter raises the overall volume without causing distortion. This makes sure your beat is as loud as professional tracks.
How to Use It:
- Set a ceiling (-0.1dB to -0.3dB): Prevents clipping.
- Check the loudness (LUFS):
- Streaming platforms: Aim for -14 to -9 LUFS.
- Club & radio: Aim for -8 to -6 LUFS.
- Avoid over-limiting: If your limiter causes distortion, your mix may be too loud before beginning with mastering beats.
Paid Tools:
- FabFilter Pro-L 2 – A clean, transparent, and precise limiter with industry-standard features.
- iZotope Ozone Maximizer – Offers advanced loudness control with intelligent features.
Free Tools:
- VladG Limiter No6 – A powerful, feature-packed limiter.
- LoudMax – A transparent brick-wall limiter for clean loudness.
Step 6: Final Checks & Exporting the Master
Before exporting, do these final quality checks:
- Listen at different volumes – Does the master still sound good at low levels?
- Check mono compatibility – Collapse to mono and make sure important elements don’t disappear.
- Test on different devices – Listen on headphones, studio monitors, phone speakers, and car audio.
Best Export Settings:
- File Format: WAV (24-bit, 44.1kHz or higher).
- Dither: Use if exporting to 16-bit for CDs.
- MP3 Conversion: Use 320kbps MP3 for best digital release quality.
The key is to make subtle improvements without over-processing. Keep practicing, experiment with different settings, and, most importantly, trust your ears.
Practical Beat Mastering Tips
Mastering a beat isn’t just about applying equalizer, compression, and limiting. It’s about making smart decisions that ensure your beat sounds balanced, professional, and consistent across different playback systems. If you’re aiming to achieve radio-ready final master, here are some practical beat mastering tips to help you achieve the best results.
Preserve Transients for Natural Impact
Transients are the quick, sharp sounds at the start of a drum hit, pluck, or percussive element. Over-processing while mastering a beat can soften transients, making the track feel lifeless and lacking punch – an issue that can affect your final master.
How to Keep Transients Sharp:
- Use a Slow-Attack Compressor: A compressor with a slow attack (30-50ms) lets transients pass through before reducing volume.
- Apply Limiting Carefully: A limiter set too aggressively will flatten transients. Reduce gain reduction only as much as needed.
- Use a Transient Shaper: If transients feel weak, a transient shaper can restore the attack and punch.
Mastering Tips #1: If your drums lose their punch after mastering, the transients are likely getting squashed — dial back compression or limiting to preserve energy in your final master.
Use Metering Tools, Not Just Your Ears
Your ears are the most important mastering tool, but metering tools provide visual insights that you might miss, especially in an untreated room.
Essential Metering Tools & What to Look For:
- LUFS Meter (Loudness) – Helps set loudness levels for streaming. (Aim for -14 LUFS for Spotify, -9 LUFS for louder masters).
- True Peak Meter – Avoids clipping distortion (Keep below -0.1dBTP).
- Spectrum Analyzer – Shows if your low-end is too boomy or highs are too harsh.
Mastering Tips #2: Always trust your ears first, but use meters to confirm your decisions. This helps ensure your final master is balanced.
Gain more control with parallel processing
Instead of applying heavy compression, saturation, or EQ directly on the master track, try parallel processing. This allows you to blend in the effect gradually, keeping the master natural and musical.
How to Use Parallel Processing while Mastering a beat:
- Parallel Compression: Blend a compressed version of the beat with the original to keep punch and energy.
- Parallel Saturation: Instead of applying saturation across the whole mix, blend in warmth subtly.
- Parallel EQ: If certain frequencies need boosting, boost them on a duplicate track and mix them in gently.
Mastering Tips #3: Parallel processing is great for preserving transients while still adding control and warmth.
Use Mid/Side Processing for Better Balance
Mid/Side (M/S) processing lets you adjust the center (mid) and sides (stereo width) separately. This technique is essential for mastering a beat as it helps avoid muddy low-end or an unbalanced stereo image.
How to Use It:
- Keep bass and kick in the mid (mono) – Prevents phase issues and keeps the low-end tight.
- Widen the highs slightly – A gentle stereo boost above 6kHz adds space without losing focus.
- Control the mids if they’re too crowded – A slight mid-cut around 300Hz-500Hz can remove muddiness.
Use Dynamic EQ Instead of Static EQ
Traditional EQ adjustments apply changes consistently, even when they aren’t needed. Dynamic EQ only makes changes when a frequency gets too loud, allowing for a more natural and adaptive beat mastering process.
How to Use Dynamic EQ:
- Control Harsh Peaks (3kHz – 6kHz): Instead of permanently reducing highs, a dynamic EQ can take them only when they spike.
- Tighten Up Muddy Lows (100Hz – 300Hz): A dynamic cut reduces boominess only when it gets overpowering.
- Enhance Presence Without Overdoing It: Apply a subtle boost around 1kHz-2kHz, but only when the mix needs it.
Mastering Tips #4: Dynamic EQ is great for vocals and leads, keeping them clear without over-processing. This makes sure that the final master retains clarity.
Common Mistakes to avoid while Mastering Beats
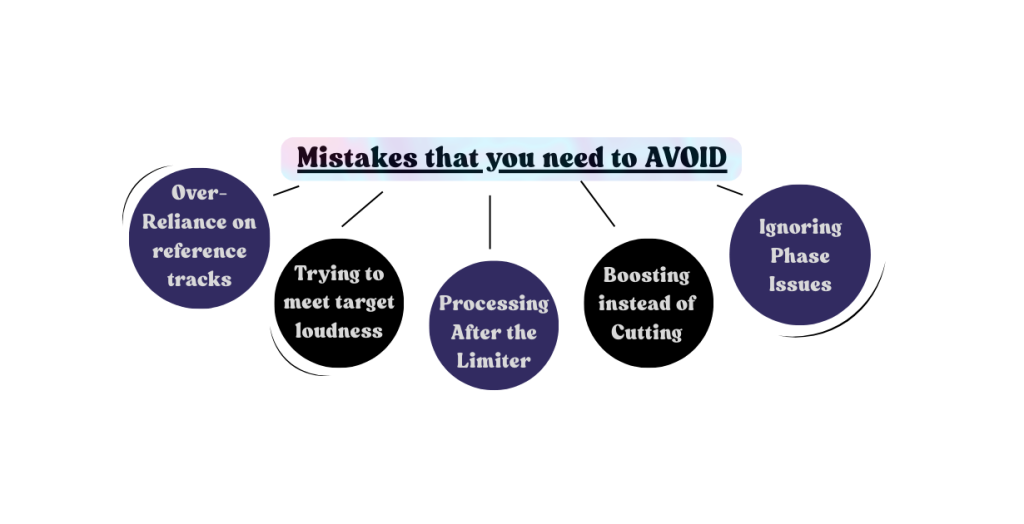
Mastering beats requires careful adjustments, but some mistakes can ruin clarity, loudness, and balance. Here are five critical mistakes and how to fix them.
Over-Reliance on Matching Reference Tracks
The Mistake: Many producers try to copy the EQ of a reference track exactly. But every song has different instruments, keys, and dynamics. Matching another track too closely can lead to unnatural tonal balance.
Fix: Use references as a guide, not a rule. Instead of copying an EQ curve, compare the overall tone, loudness, and dynamics. Trust your ears first, tools second to make the right choices for your track.
Relying Too Much on Loudness Targets
The Mistake: Some producers think hitting a specific loudness (like -14 LUFS for streaming) is a must. But not all tracks should be the same loudness. Some genres need more dynamic range, while others sound better with higher RMS levels.
Fix: Focus on musicality over loudness. Streaming platforms normalize volume anyway, so preserve dynamics instead of pushing loudness too far.
Processing After the Limiter
The Mistake: Applying EQ or effects after the limiter creates new peaks, which can cause distortion. Since the limiter sets the volume ceiling, any extra processing pushes peaks past safe levels.
Fix: Always put the limiter last in the mastering chain. If you need to adjust EQ, compression, or stereo width, do it before limiting.
Over-Boosting High Frequencies for Clarity
The Mistake: Many producers add too much high-end to make a mix sound clearer. But too much high-frequency boosting can make the track harsh and cause listener fatigue.
Fix: Instead of adding highs, check if clarity improves by removing problem areas in the low-mids (200Hz-500Hz). Try subtle saturation or harmonic excitement instead of extreme EQ boosts. If boosting highs, use wide, smooth curves, not sharp boosts.
Ignoring Phase Issues while Mastering beats
The Mistake: Phase issues cancel out parts of the mix, making the track sound thin or weak. This happens with stereo widening, extreme EQ changes, or poor mic placement. If not fixed, phase problems hurt mono playback (in clubs, radio, or phone speakers).
Fix: Always check mono playback to spot phase issues. If sounds disappear or weaken, use Mid/Side EQ to fix width issues. Phase-correction tools help organize misaligned frequencies. Keep low frequencies in mono to prevent phase loss.
Avoiding these mistakes will improve clarity, balance, and loudness in your masters. Mastering beats is about fine adjustments, not extreme changes. Keep it clean, dynamic, and natural for the best results!
Need a Helping Hand? AI-Assisted Mastering tool can Help

Let’s be real—mastering beats can be frustrating. You’ve spent hours perfecting your mix, and now you need to make it louder, clearer, and balanced across all devices. But with so many steps—EQ, compression, stereo imaging, loudness control—it’s easy to feel stuck.
Wouldn’t it be great if there was a faster way to get a professional-sounding final master?
Meet Remasterify, an AI-powered beat mastering tool that gets the job done in seconds!
Remasterify analyzes your track and applies the right EQ, compression, stereo adjustments, and limiting—so you don’t have to guess your way through the process. Whether you’re a beginner needing a high-quality final master instantly or a pro looking for a quick reference, this tool makes things simple and efficient.
Why not give it a shot? Upload your track and see how effortless mastering beats can be!
In summary
Mastering can feel like the final boss of music production—but it doesn’t have to be intimidating. With the right mastering process, you can turn a good mix into a great-sounding final master that stands out on any platform.
We’ve covered everything from EQ, compression, and stereo imaging to avoiding common mistakes like over-compression and poor phase handling. The key? Keep things balanced, trust your ears, and don’t overdo it.
If mastering beats still feels like a struggle, you’re not alone. Even pros take years to refine their technique. But the good news? AI-powered tools like Remasterify can help you get radio-ready final masters in seconds, so you can focus on making music instead of stressing over the final polish.
At the end of the day, mastering is about bringing your music to life. So go ahead—experiment, learn, and keep pushing your sound forward. Ready to hear your track mastered instantly? Try Remasterify today!