Audio Equalization, also abbreviated as EQ, is one of the most important tools in music mixing. When EQ is used effectively, each element can blend harmoniously in the mix without clashing or getting lost.
Whether you’re working on vocals, instruments, or beats, using EQ can help eliminate harsh frequencies and enhance the desired parts. In this blog, we’ll walk you through the basics of audio equalization, different types, different shapes, and many more.
Table of Contents:
Understanding Frequency Ranges first
What Is EQ in Music and Why Does It Matter?
Audio Equalization Tips and Tricks
Understanding Frequency Ranges first
To use EQ effectively, it is helpful first to understand the frequency ranges. Every sound you hear in music falls somewhere along the frequency spectrum.
| Range | Approx. Frequency | What It Affects |
| Sub-bass | 20 – 60 Hz | Deep rumble, subwoofers, felt more than heard; adds power and weight. |
| Bass | 60 – 250 Hz | The core of kick drums and bass guitars adds warmth and fullness. |
| Low-mids | 250 – 500 Hz | The thickness of vocals and instruments; too much can sound muddy. |
| Midrange | 500 Hz – 2 kHz | Most musical detail lives here—vocals, guitars, piano tones. |
| High-mids | 2 – 6 kHz | Adds presence and attack; too much can cause harshness. |
| Highs (Treble) | 6 – 20 kHz | Air, sparkle, clarity, cymbals; boosts brightness but can get sharp fast. |
You don’t need to memorize exact numbers, but understanding and mastering how lows, mids, and highs affect your mix helps you make better EQ choices and avoid common problems, like clashing sounds or lost details.
What Is EQ in Music and Why Does It Matter?
Audio Equalization is the process of adjusting the volume of specific frequency ranges in a sound. In music mixing, it helps shape how each element of a track fit together.
Without Audio Equalization, sounds can overlap in the same frequency space, making the mix feel cluttered or unclear. For example, if you have a vocal recording with unnecessary low-end frequencies, it can clash with the bass elements, resulting in a muddy mix. Using EQ to cut the unnecessary low frequencies from non-bass sounds helps prevent muddiness and keeps the mix clean.
Similarly, EQ can also make vocals sound clearer. If they feel dull or buried, a small boost in the high frequencies can bring clarity. Cutting some low-mids can also reduce muddiness. With just a few tweaks, EQ helps vocals stand out and sound more polished without clashing with other elements.
Different Audio EQ Parameters
Gain
Gain controls how much you enhance or cut a specific frequency. Positive gain makes a sound louder in that range, while negative gain reduces it.
Frequency
This lets you choose which part of the sound spectrum you want to adjust—like the lows, mids, or highs. For example, you might target 100 Hz for bass or 4 kHz for clarity in vocals.
Bandwidth (Q)
Q (or bandwidth) determines how wide or narrow your EQ adjustment is. A high Q affects a narrow range (useful for fixing harsh frequencies), while a low Q affects a broader area.
Filter Types
EQ filters shape how the frequencies are adjusted. Common types include bell, high-pass filter (removes low frequencies), and low-pass filter (removes high frequencies).
Slopes
Slopes apply to filters and control how steeply the frequencies are reduced. A steeper slope cuts more aggressively past the selected point, while a gentler slope is more subtle.
Bypass
Bypass lets you turn the Audio EQ on or off. It’s useful for comparing the original sound with the EQ’d version to determine if the changes enhance or detract from the mix.
Node/Point
In visual EQs, nodes or points are draggable handles you use to adjust gain, frequency, and Q directly. They make EQ adjustments easier to understand and apply.
Types of Audio Equalization
Parametric EQ
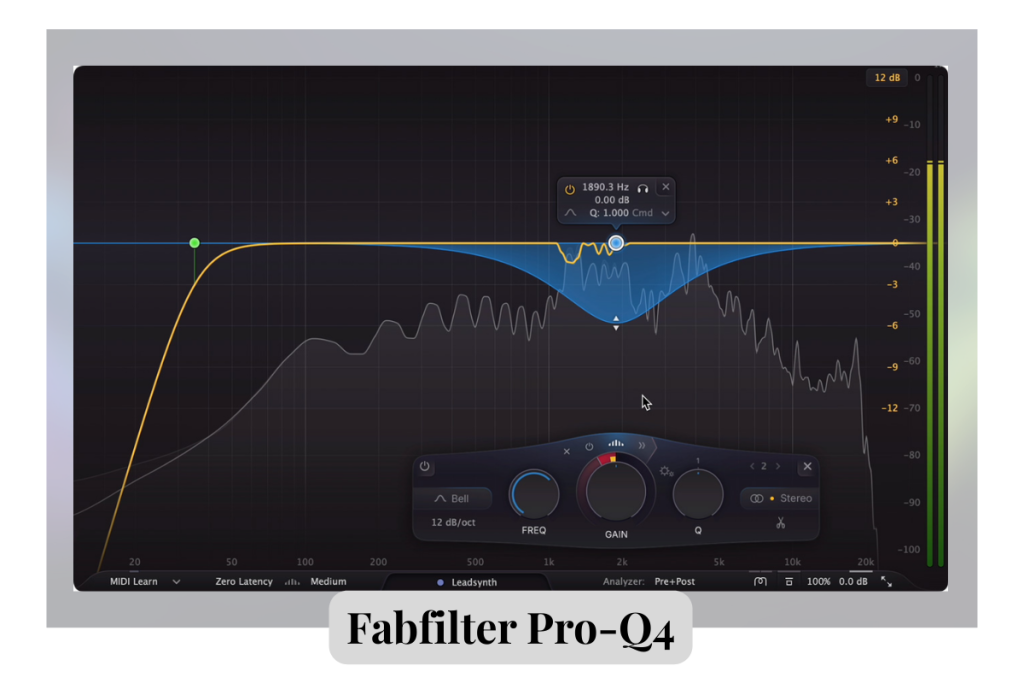
Parametric EQ gives you full control over frequency, gain, and bandwidth (Q). You can target exact frequencies and shape them precisely. It’s great for detailed mixing work like cleaning up muddy vocals or fixing harsh tones.
On-Screen plugin – Fabfilter Pro-Q4
Semi-Parametric EQ
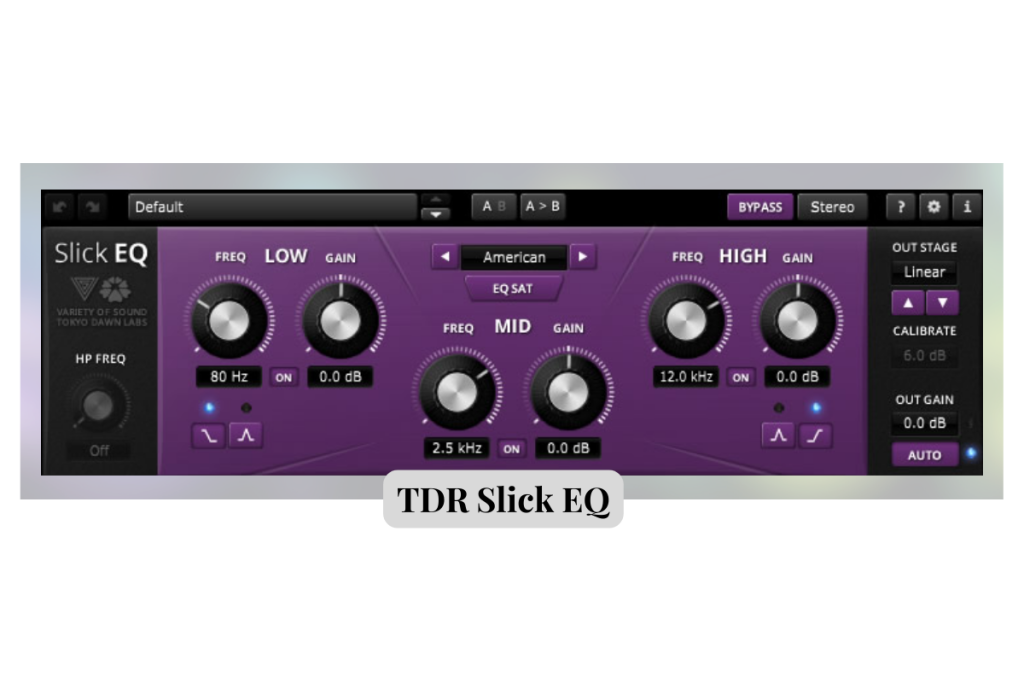
A semi-parametric EQ gives you some control (usually frequency and gain) but not Q (bandwidth). That means you can choose what frequency to boost or cut and by how much, but you can’t adjust how wide or narrow the change is. It’s often found in live sound mixers or basic plugin EQs.
On-Screen plugin – TDR Slick EQ
Graphic EQ
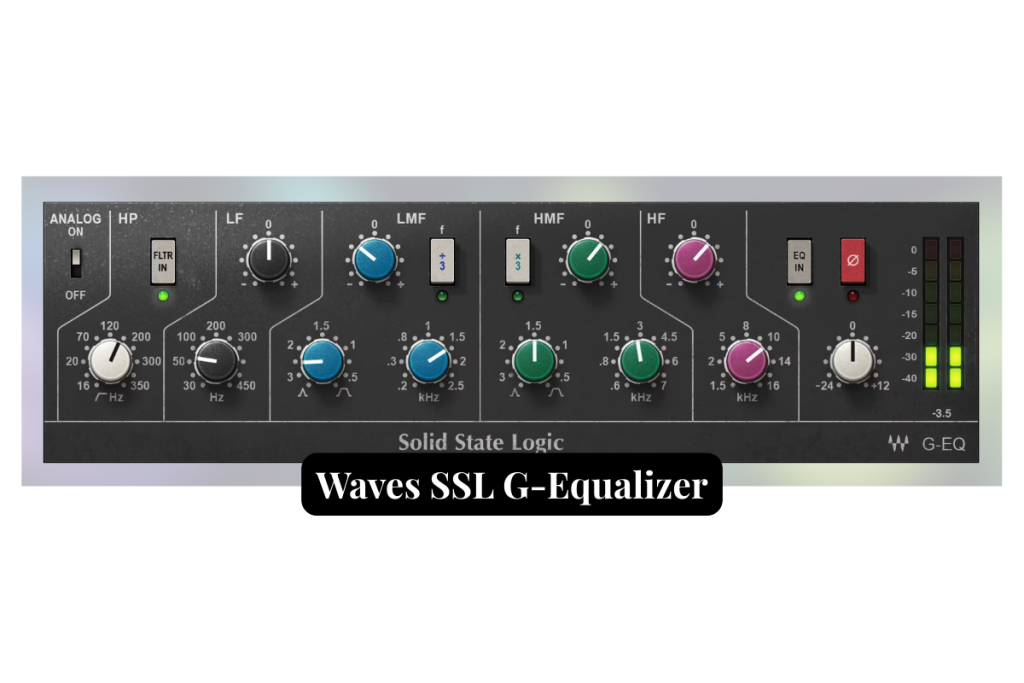
Graphic EQ has fixed frequency bands, each with its own slider. You adjust the sliders to boost or cut specific ranges. It’s simpler but less flexible than parametric EQ, which is often used in live sound or for quick fixes.
On-Screen plugin – Waves SSL G-Equalizer
Shelving EQ
A shelving EQ boosts or clean up audio above or below a chosen frequency. A high-shelf can add brightness to vocals or cymbals, while a low-shelf can reduce rumble in the mix. It affects a wide range of sounds, making it useful for overall tone shaping rather than fixing narrow problem areas. Simple and great for quick adjustments.
Dynamic EQ
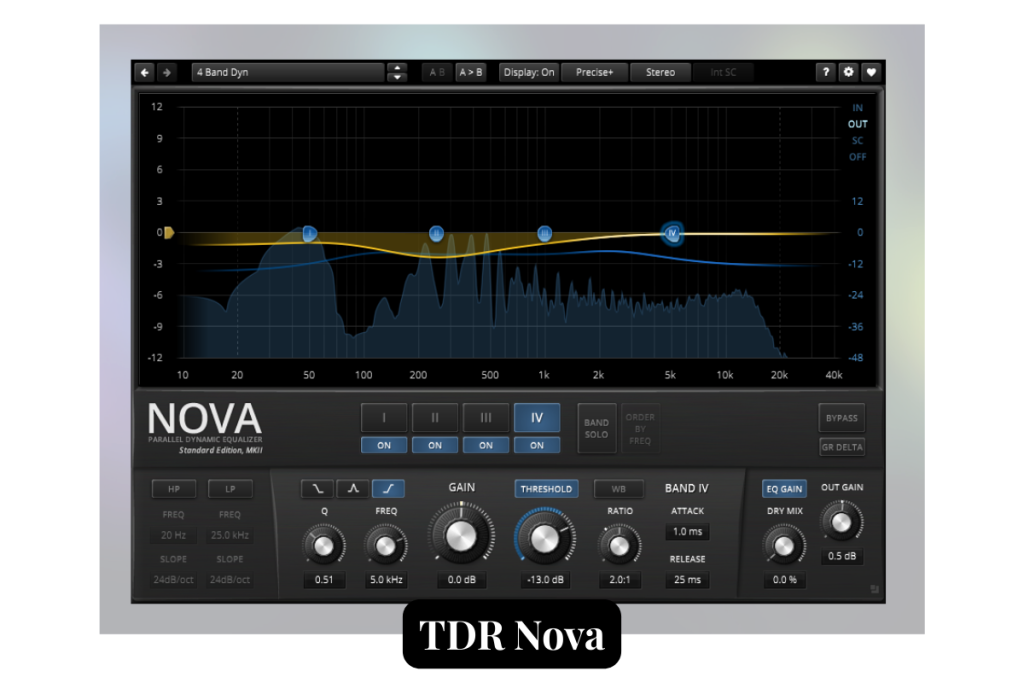
Dynamic EQ works like a mix of EQ and compression. It adjusts the gain of specific frequencies only when they cross a set threshold. For instance, if a vocal has harsh peaks at 3 kHz that appear only at louder moments, a dynamic EQ can reduce just that frequency only when needed, without affecting the rest of the take.
Passive EQ
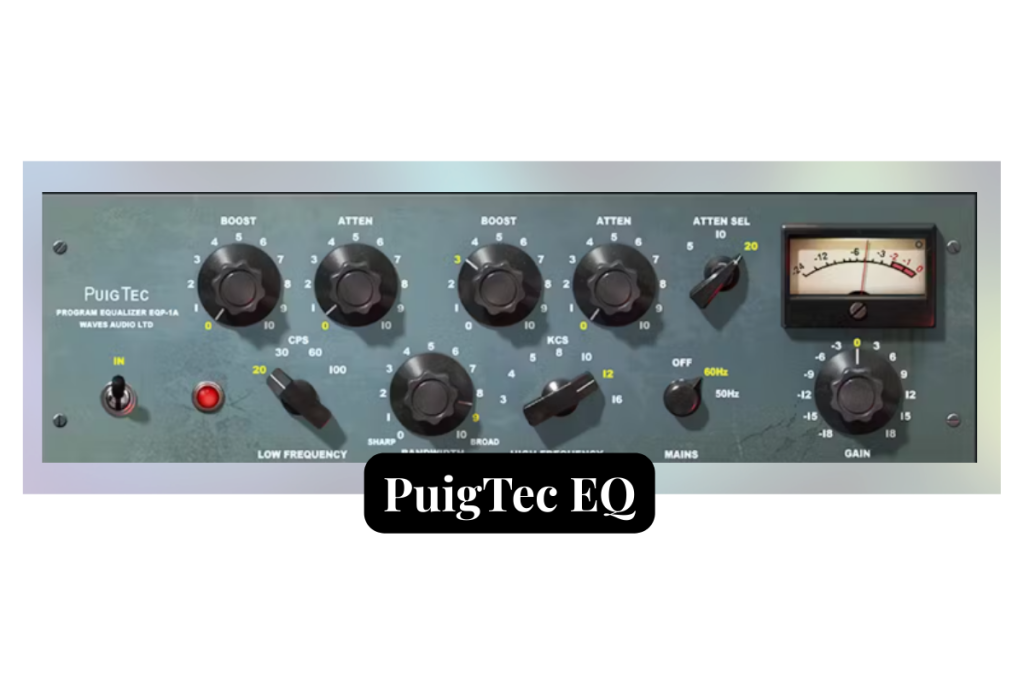
A passive EQ doesn’t actively boost signals. It uses electronic components to shape the sound smoothly. Most modern passive EQs are emulated in software based on vintage hardware. They are known for their natural, warm, and musical sound, especially when cutting or boosting wide areas.
Analog-Style EQ
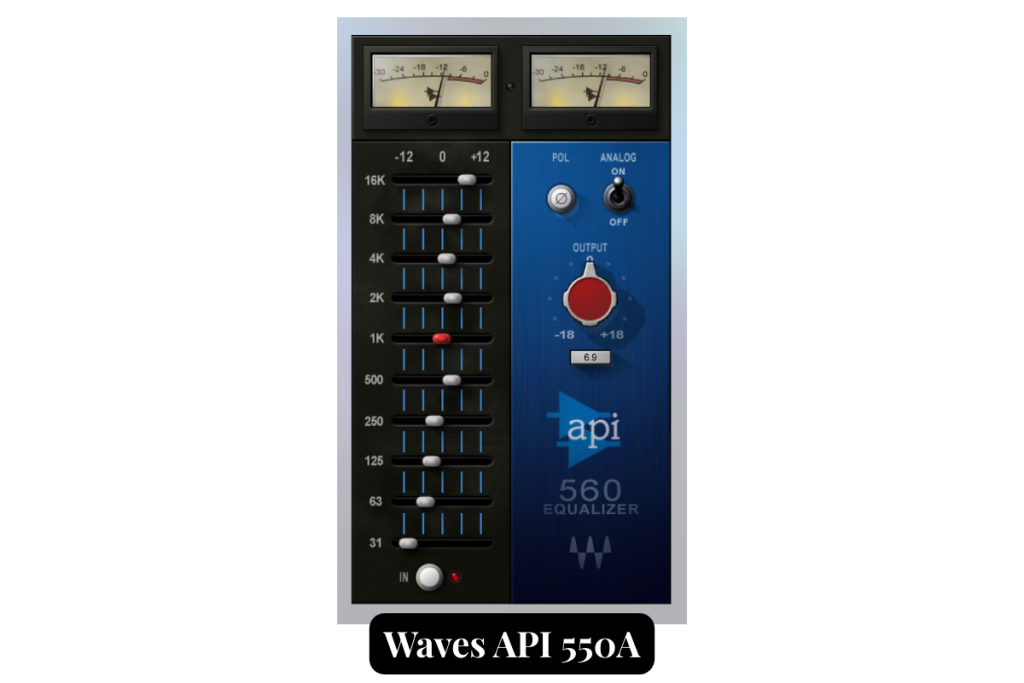
Analog-style EQs are digital plugins designed to mimic vintage hardware equalizers. They often add subtle saturation, color, or warmth along with EQ changes. These EQs are less surgical and more musical, meaning they’re not always precise but sound pleasing. For example, the Pultec EQ plugin is known for making vocals and drums sound rich and full, even with just a few tweaks.
Different Filter Shapes
Low-pass
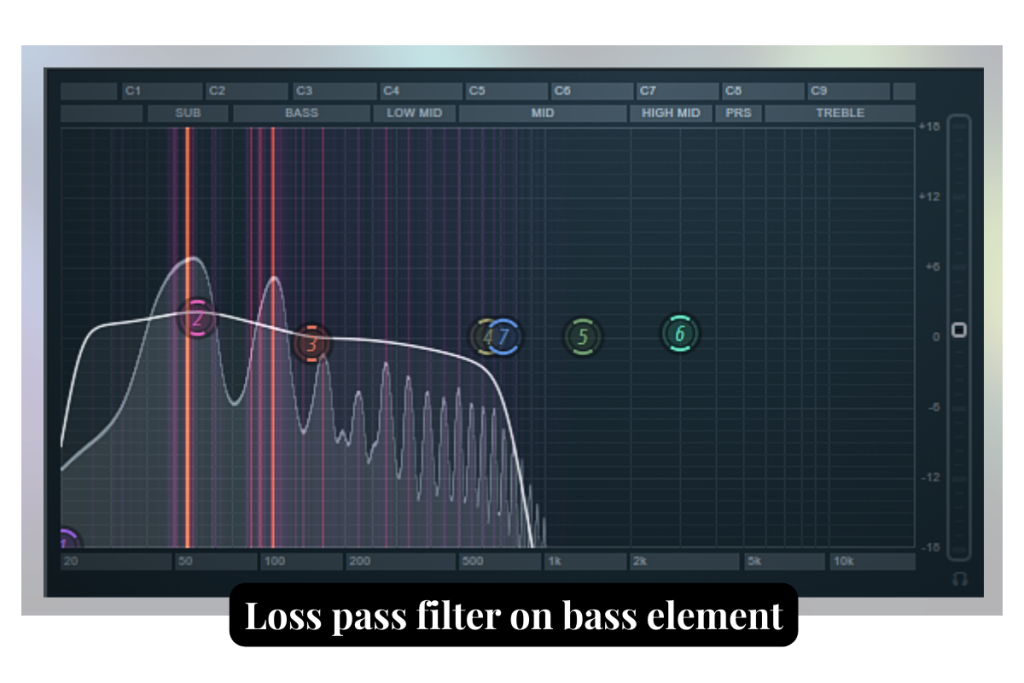
What it does: Allows low frequencies to pass through and cuts the highs.
When to use: Use it to remove hiss or harsh high-end from background sounds, synths, or reverb tails.
High-pass
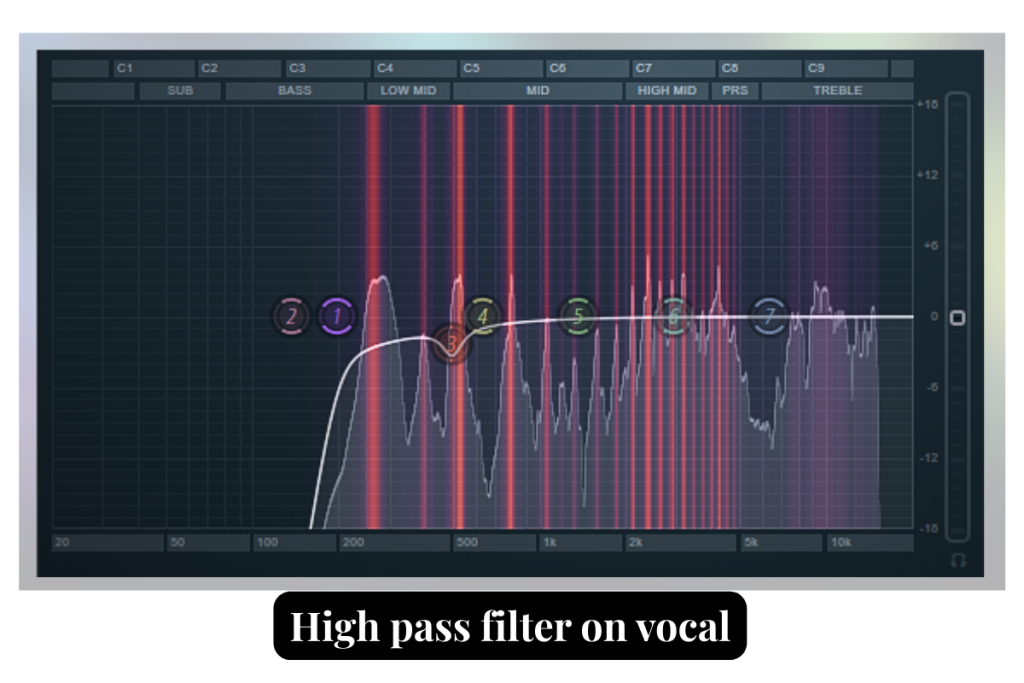
What it does: Allows high frequencies to pass through and cuts the lows.
When to use: Commonly used on vocals, guitars, or cymbals to remove rumble and clean up the low-end.
Band-pass
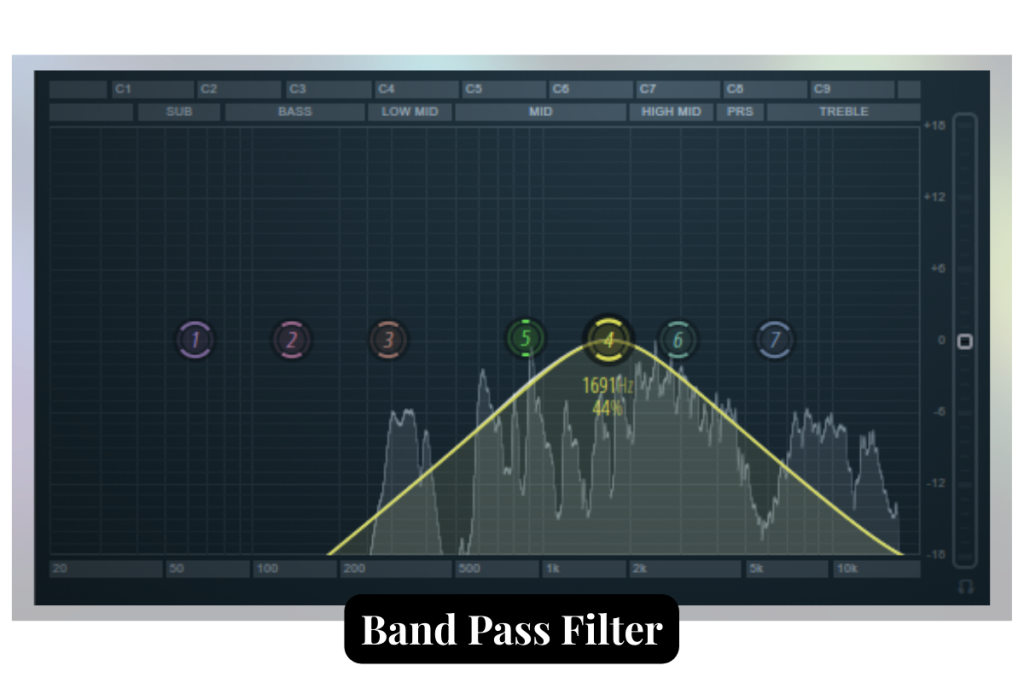
What it does: Lets through a specific range of frequencies and cuts everything above and below.
When to use: Useful for telephone-style vocal effects or isolating a sound’s core frequency range.
Band Stop
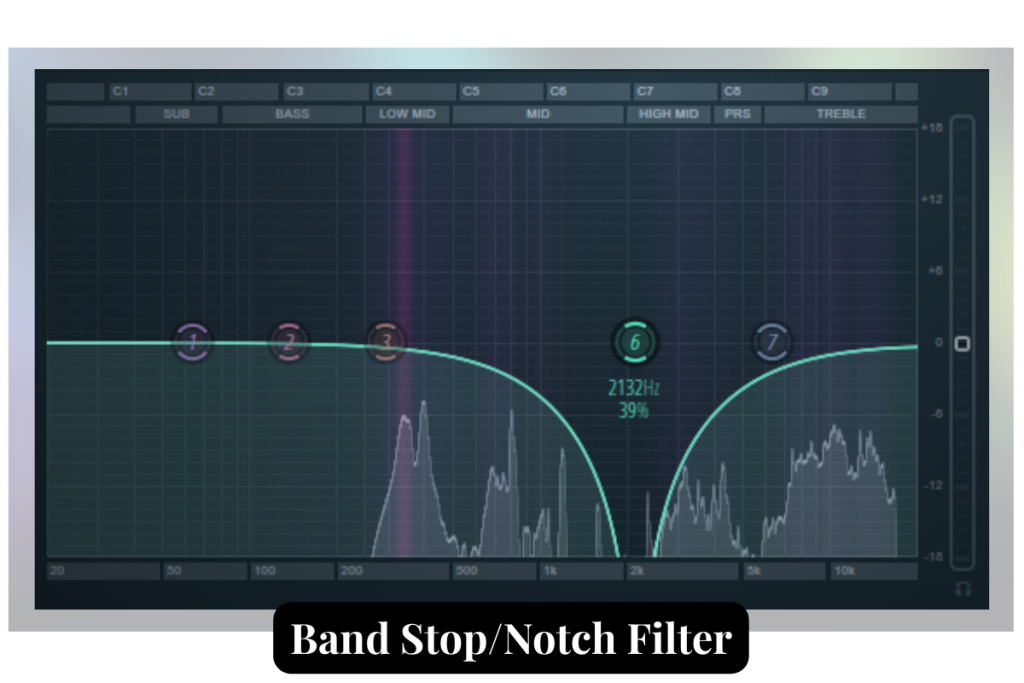
What it does: Cuts out a small, narrow range of frequencies and leaves the rest untouched.
When to use: Ideal for eliminating unwanted hums, whistles, or feedback without compromising the overall sound.
Low shelf
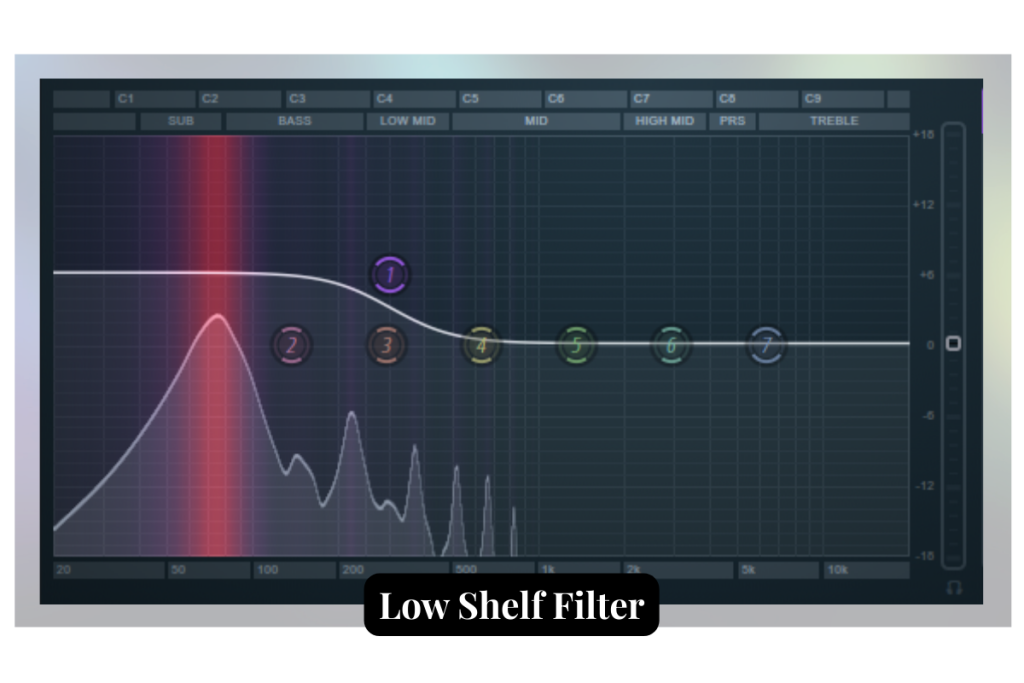
What it does: Boosts or cuts all frequencies below a chosen point.
When to use: Boost lows for more warmth, or cut them to reduce muddiness in vocals or guitars.
Peaking
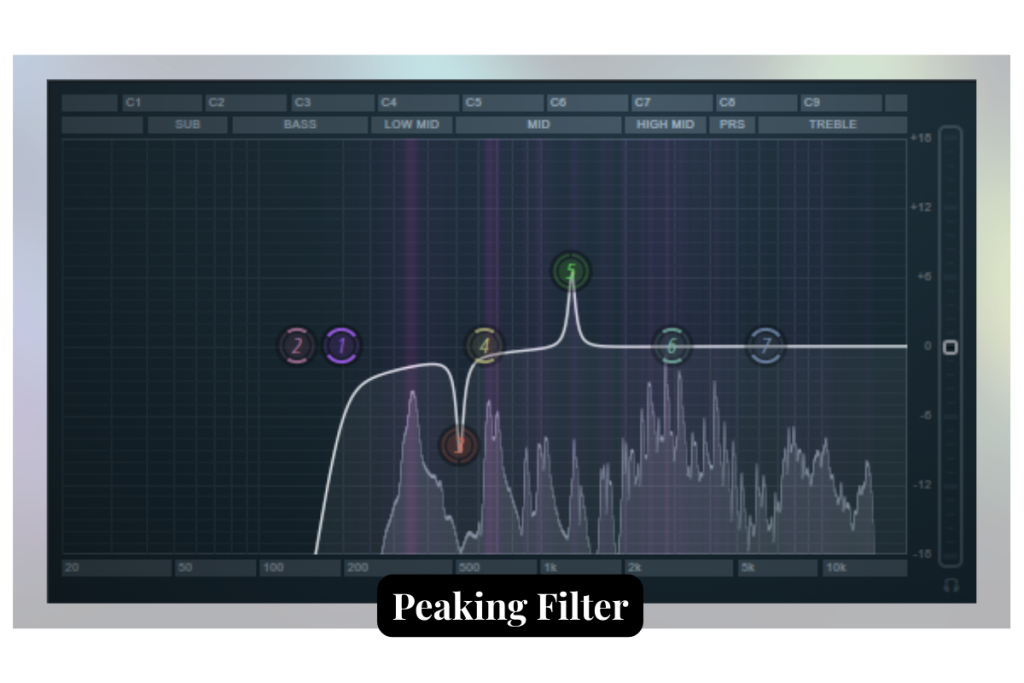
What it does: Boosts or cuts a specific frequency in a bell shape.
When to use: Ideal for fixing boxy vocals, harsh tones, or enhancing the tone of specific instruments.
High shelf
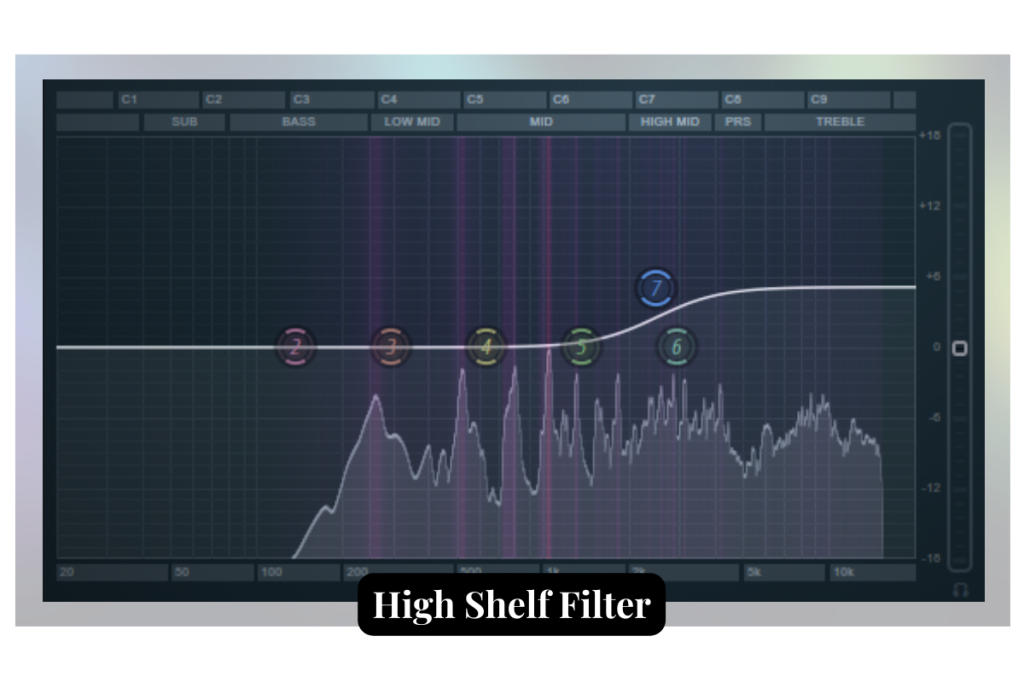
What it does: Boosts or cuts all frequencies above a chosen point.
When to use: Boost to add air and brightness to vocals, or cut to tame sharp cymbals or hiss.
Audio Equalization Tips and Tricks
Focus on Cutting Rather Than Boosting
Instead of boosting the parts you like, try cutting the parts you don’t. Cutting helps avoid overloading your mix and keeps the sound more natural. For example, if a vocal sounds muddy, cutting a bit around 250–400 Hz can clean it up without needing to boost the highs. Cutting unwanted frequencies also creates more space for other instruments to sit comfortably in the mix. It’s a cleaner and safer way to improve clarity.
Use High-Pass Filters on Tracks That Don’t Need Bass
Not every sound needs low-end energy. Instruments like vocals, guitars, and hi-hats often carry unnecessary sub-frequencies that muddy the mix. A high-pass filter cuts those low frequencies, clearing up the bottom end. For example, placing a high-pass filter at around 80–100 Hz on a vocal track can remove rumble without affecting its tone. This gives more room to your bass and kick drum to breathe.
Sweep to Find Problem Frequencies
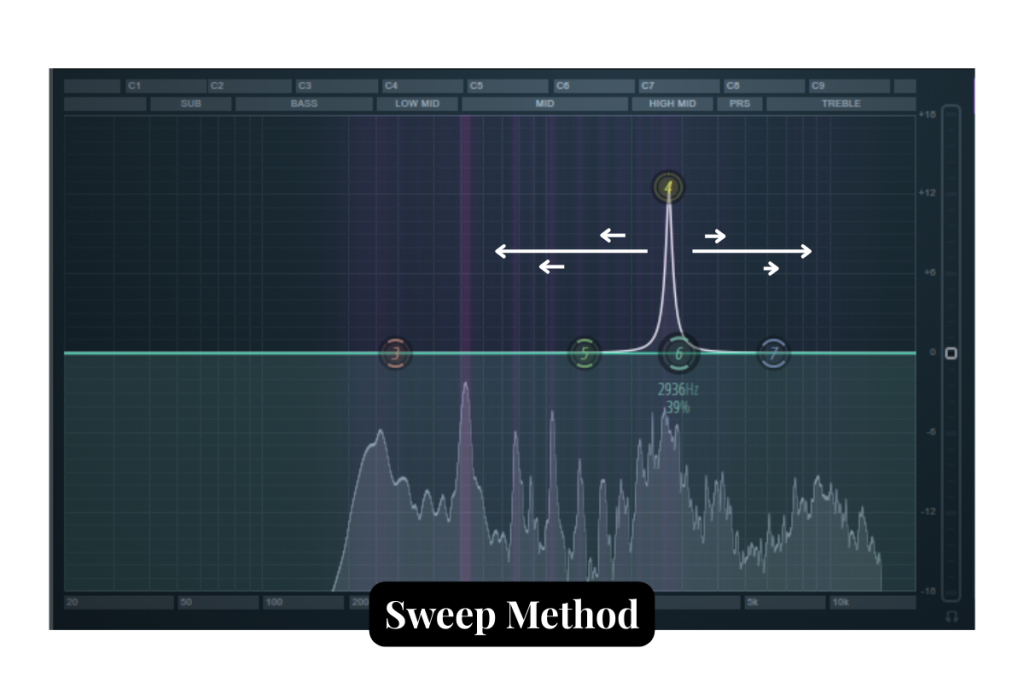
Use the “sweep method” to find harsh or muddy spots. Slightly boost a narrow Q band and move it across the spectrum while listening. When something sounds piercing, boomy, or unpleasant, that’s a frequency you might want to cut. For example, sweeping might reveal a nasal tone in vocals at 1.2 kHz—cutting it gently will smooth things out.
Don’t EQ in Solo
It’s tempting to solo a track and EQ it until it sounds perfect. But in the full mix, that same EQ might not work. Always EQ while listening to everything together. For example, a snare might sound thin on its own, but it fits just right when the kick and bass are playing. Mixing is about how sounds work together, not alone.
Tame Harsh Highs with a Low Slope High-Shelf or Dynamic EQ
Harsh high frequencies can make a mix sound sharp or fatiguing. Instead of a deep cut, try a gentle high-shelf starting around 6–8 kHz to soften brightness. Or use dynamic EQ to reduce those frequencies only when they spike, like during loud vocal parts or splashy cymbals. This keeps the mix smooth without killing clarity.
FAQ
How does Audio Equalization work in music?
EQ (equalization) adjusts the volume of specific frequency ranges—low, mid, or high. It helps each sound in your mix stand out and prevents them from clashing.
Does EQ make music sound better?
Yes, when used right. EQ can help clean up audio, highlight important elements like vocals, and create a more balanced and professional mix.
How do I know which frequencies to cut or boost?
Listen closely. If something sounds too harsh, muddy, or dull, identify the range it sits in and make small adjustments. Start by cutting problem areas before boosting anything.
What’s the best EQ setting for vocals?
Remove low-end rumble (below 80–100 Hz), refine boxy mids (around 300–500 Hz), and gently enhance clarity (2–5 kHz) and air (10 kHz and above). Always adjust based on the actual vocal sound.
How do I fix a muddy mix with EQ?
Cut low-mids (200–500 Hz) from instruments or vocals that don’t need extra warmth. Use high-pass filters on tracks that shouldn’t have bass, like guitars or background effects.
What’s the best order: Audio Equalization before or after compression?
Both can work. EQ before compression cleans the signal going in. EQ after compression fine-tunes the final sound. Many mixers use both at different stages.
Final Thoughts
Audio Equalization is all about making thoughtful choices to improve your mix. It’s not about using every tool or making big changes, but about listening and making small adjustments where needed. With time, you’ll develop a better feel for when and how to use EQ. The more you practice, the more natural and effective your decisions will become.
