If you’re a new creator making covers, reels, or YouTube videos, you’ve probably faced this: your voice sounds muddy, harsh, or just not professional enough. Even if you sing well or record with a decent mic, the raw audio often doesn’t match what you hear in polished tracks online.
That’s because clean vocals don’t just happen naturally. They need a little help from tools called plugins, small pieces of software that shape and polish your voice. Think of them like photo filters, but for sound. Without them, your vocals may sound flat, noisy, or uneven, no matter how much effort you put in.

The good news is you don’t need to be a sound engineer to use them. With just a few basic plugins, you can fix most vocal problems and get closer to that clear, professional sound your audience expects.
Table of Contents:
The 5 Things That Plugins Can Fix in Your Vocals
The 5 Essential Plugins for Vocal Cleanup
Do You Need All These 5 Plugins?
The 5 Things That Plugins Can Fix in Your Vocals
Before diving into the actual plugins, let’s look at the five key problems most new creators face when recording vocals. Each problem usually needs its own kind of plugin to fix:
| What’s the Problem? | What It Sounds Like? | Plugin You Need |
| Uneven tone (muddy or harsh parts) | Vocals sound dull in some areas, too sharp in others | EQ (Equalizer) |
| Uncontrolled loud/soft parts | Some words pop out, others get buried | Compressor |
| Sharp “S” or “T” sounds (sibilance) | Harsh “sss” or “tsss” that hurt the ears | De-Esser |
| Off-pitch notes | Great performance, but slightly out of tune | Pitch Correction (Auto-Tune, Melodyne) |
| Flat, dry vocal with no space | Voice feels too close, no depth | Reverb/Delay |
With just these five plugins, you can solve 80% of the problems in beginner vocal recordings. The rest is just practice and small tweaks.
The 5 Essential Plugins for Vocal Cleanup
Raw vocals often carry problems. That’s totally normal. You’ll only notice that after recording, with any of these: harsh tones, uneven loudness, or distracting background sounds. For that you need some vocal cleanup plugins that will work as your repair tools. Let’s explore the five essentials every beginner should know.
1. Equalizer (EQ) – To Shape Your Vocal’s Tone
Think of EQ as the color corrector for sound. Just like adjusting brightness and contrast improves a photo, EQ adjusts frequencies to make your voice clearer and more natural. Even a basic vocal cleaner plugin can make a huge difference here, and most DAWs already include one. Read More about equalization.
Why you need it:
- Raw recordings often capture extra rumble, harsh treble, or muddiness. These flaws distract from your actual voice.
- EQ lets you “carve out” unwanted sounds while highlighting the sweet spots in your vocal range.
- Without EQ, your voice may sound flat or unbalanced across different speakers.
How to use it:
- Roll off the low end (below 80–100 Hz) to cut mic rumble.
- Slightly dip around 200–400 Hz if your voice feels boxy.
- Smooth out harshness in the 2–5 kHz range.
- Boost gently around 8–12 kHz for air and clarity.
Popular EQ Plugins:
- Stock EQs: Logic Pro Channel EQ, Ableton EQ Eight, FL Studio Parametric EQ 2.
- Third-Party: FabFilter Pro-Q 3, Waves Q10.
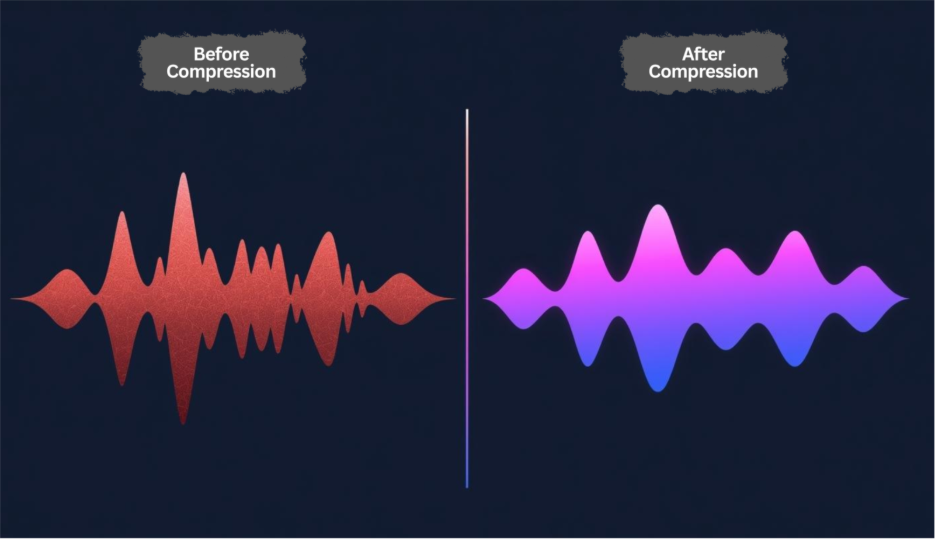
2. Compressor – To Control Uneven Loudness
Suppose you’re listening to someone who whispers one word and shouts the next. That inconsistency is very common in raw vocals. A compressor smooths these jumps so your audience hears a balanced, steady voice.
Why you need it:
- Uncontrolled dynamics make vocals tiring to listen to.
- Compression keeps your words consistently present without sudden volume spikes. But it is also impoortant to avoid over-compression.
- A compressed vocal blends more naturally with background music.
How to use it:
- Set the threshold so only louder parts trigger compression.
- Use a gentle ratio (2:1 or 3:1) for beginners.
- Adjust attack and release so the compressor reacts smoothly, not abruptly.
Popular Compressor Plugins:
- Stock: Logic Compressor, Ableton Glue Compressor, Cubase Compressor.
- Third-Party: Waves CLA-2A, FabFilter Pro-C 2.
3. De-Esser – To Fix Sharp “S” Sounds
Ever noticed how “S” and “T” sounds cut sharply, especially through earbuds? That’s sibilance, and it can ruin otherwise great takes. A de-esser works like a filter that only turns down those piercing moments.
Why you need it:
- Sibilance is fatiguing and unpleasant to listeners.
- Without fixing it, even strong performances sound amateurish.
- A de-esser targets only harsh consonants while leaving the rest of your tone intact.
How to use it:
- Focus on the 5–8 kHz range where “S” sounds usually sit.
- Adjust sensitivity so only the problem areas are reduced.
- Keep it subtle. Too much de-essing can make your voice dull or lispy.
Popular De-Esser Plugins:
- Stock: Logic De-Esser 2, Cubase DeEsser.
- Third-Party: Waves DeEsser, FabFilter Pro-DS.
If you don’t want to spend money early, try a free plugin vocal cleaner that includes de-essing features, many stock ones work surprisingly well. Read More.
4. Pitch Correction – To Stay in Tune
Even good singers slip off-pitch sometimes. Tools like Auto-Tune or Melodyne help keep every note aligned, giving your vocals polish without stealing their character. Beginners often pair a pitch correction tool with a vocal cleaner plugin to keep both tuning and clarity under control.

Why you need it:
- Small pitch errors stand out more on recordings than live.
- Correction builds listener trust. People won’t focus on mistakes.
- Controlled tuning helps your voice sit neatly with instruments.
How to use it:
- Choose your key/scale before applying correction.
- Use slower correction speeds for natural results.
- Save fast, robotic settings for stylistic effects (like in hip-hop or pop).
Popular Pitch Correction Plugins:
- Auto-Tune by Antares (standard in modern music).
- Melodyne by Celemony (more natural, detailed control).
- Stock: Logic Pitch Correction, Cubase VariAudio.
5. Reverb/Delay – Adding Natural Space
Dry vocals often feel “too close,” as if you’re speaking directly into someone’s ear. Reverb and delay add depth, giving your voice a sense of place, like moving from a small bedroom to a warm studio.
Why you need it:
- A touch of space makes vocals sound fuller and more professional.
- Reverb blends your voice with background music instead of sitting awkwardly on top.
- Delay adds rhythmic echoes that create width and energy.
How to use it:
- Use short, subtle reverb for natural presence.
- Add light delay for emphasis on certain words or phrases.
- Always keep effects balanced. Too much can make vocals muddy or distant.
Popular Reverb/Delay Plugins:
- Stock: Ableton Reverb, Logic Space Designer, FL Studio Reeverb 2.
- Third-Party: Valhalla VintageVerb, Waves H-Delay, FabFilter Pro-R.
Do You Need All These 5 Plugins?
Here’s the truth: downloading, learning, and paying for five different plugins right at the start is tough. Each plugin has its own settings, and if you’re new, it’s easy to feel lost. On top of that, buying premium versions can quickly turn into a heavy expense.
That’s why many new creators choose Remasterify. Instead of juggling multiple tools, it handles all these tasks: EQ, compression, de-essing, pitch correction, and reverb, automatically in one clean workflow.
Why Remasterify makes sense for beginners:
- Simple UX – easy to navigate, no confusing setup.
- <1 min result – upload your vocal, get a mastered version instantly.
- Free unlimited trying – test as many times as you want before settling.
- Affordable plans – far cheaper than buying five separate plugins.
- Unlimited mastering & downloads within your subscribed period.
- Metadata editing – fix track name, artist, cover, and copyright before release.
- Publish-ready audio – files optimized for streaming platforms, YouTube, and social media.
With Remasterify, you get the same benefits of a plugin chain without the complexity, the steep learning curve, or the cost. Free unlimited trying; so, you can experiment without hunting for the best vocal cleaner plugin free online.
If you’re just starting out and want your vocals to sound clean and professional without getting lost in settings, give Remasterify a try. It’s like having your own vocal cleanup engineer, always ready when you need it.
Final Thoughts
Clean vocals are the difference between sounding amateur and sounding publish-ready. You don’t need to master every plugin to get there; what matters is choosing a workflow that lets your voice shine. Whether you take time to learn each tool or lean on Remasterify for a faster path, the goal is the same: let your creativity reach people without technical barriers holding you back.