Mastering is the final stage in music production. It prepares your track for release across streaming platforms, ensuring it sounds consistent everywhere. But before mastering a mix, you need to clean up audio, balance it, and organize it. Mastering a messy mix will only amplify the problems.

In this guide, you’ll learn six simple and essential ways to prepare your mix so it’s truly ready for mastering.
Table of Contents
Clean up individual clips first.
Leave proper headroom for mastering a mix.
Fix phase issues and mono-compatibility
Apply the Best Export Settings
Clean up individual clips first.
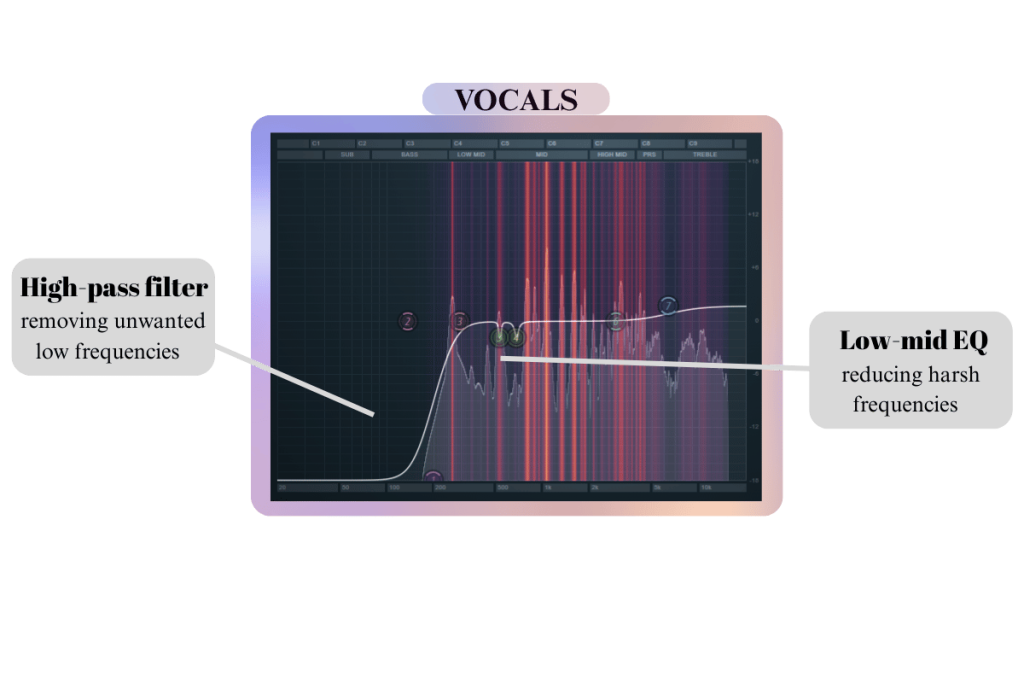
The first step is to tidy up your session. Messy audio clips can easily slip into your final master if you’re not careful, thereby ruining the quality of your song.
Here are few tips for cleaning up individual clips:
- Start by cutting rather than boosting frequencies.
- If you have multiple takes or muted layers, delete or disable them to keep the session clean and CPU-friendly.
- Cut out empty or noisy sections at the start and end of each clip to avoid background hiss, hum, or room noise.
- Use a high-pass filter on non-bass song elements (like vocals or guitars) to clean up audio and remove muddiness.
- Keep a close look at low-mid frequencies and make adjustments accordingly.
- Use effects strategically to create depth. But avoid overusing them.
Leave proper headroom for mastering a mix.
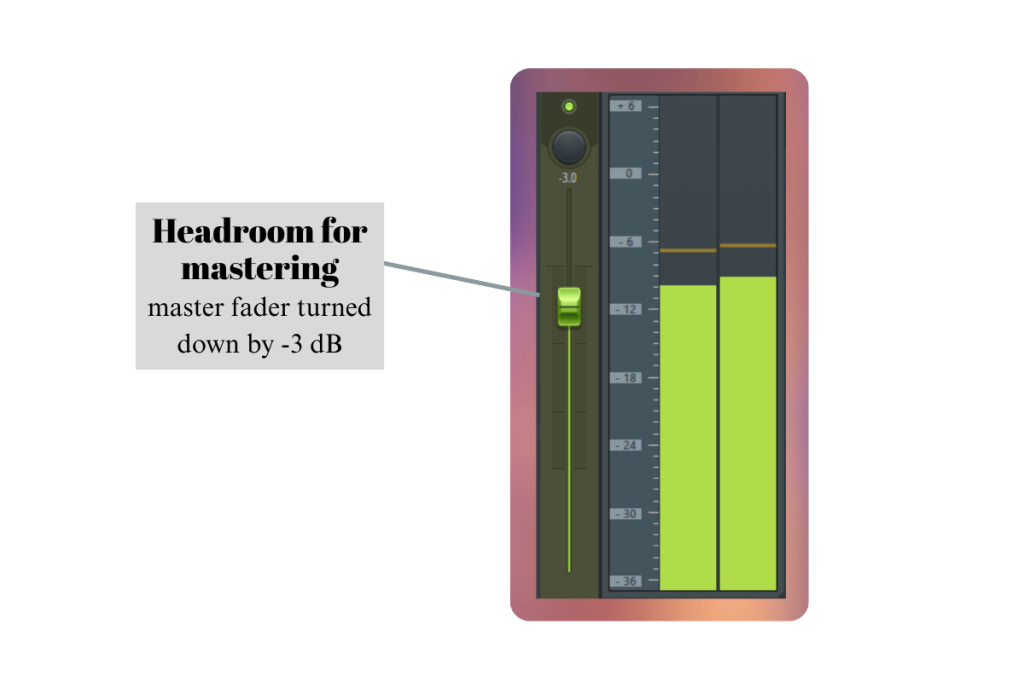
Headroom is the space between the loudest part of your track and 0 dBFS (digital full scale). It is highly important to leave enough headroom before you send your track for mastering. When you leave headroom for mastering, there is enough space left for the engineer to post-process your mix and master it efficiently. Secondly, leaving headroom prevents issues such as unwanted artifacts and clipping. This can, otherwise, be a major problem as clipping can ruin your entire mix.
How can you create headroom?
It’s pretty simple!
- First, remove any plugins that alter the sound characteristics or audio levels of your final mix. For example, if you have a limiter in your master bus that increases the levels, you need to remove it.
- The next step is to adjust the faders of your mix bus. It is generally recommended to leave -3 dB to -6 dB headroom for mastering a mix.
Tip: Use a loudness analyser, such as the Youlean Loudness Meter. It can help track the monetary loudness, short-term loudness, as well as the true peak max, allowing you to measure the levels accurately.
Check for Clipping
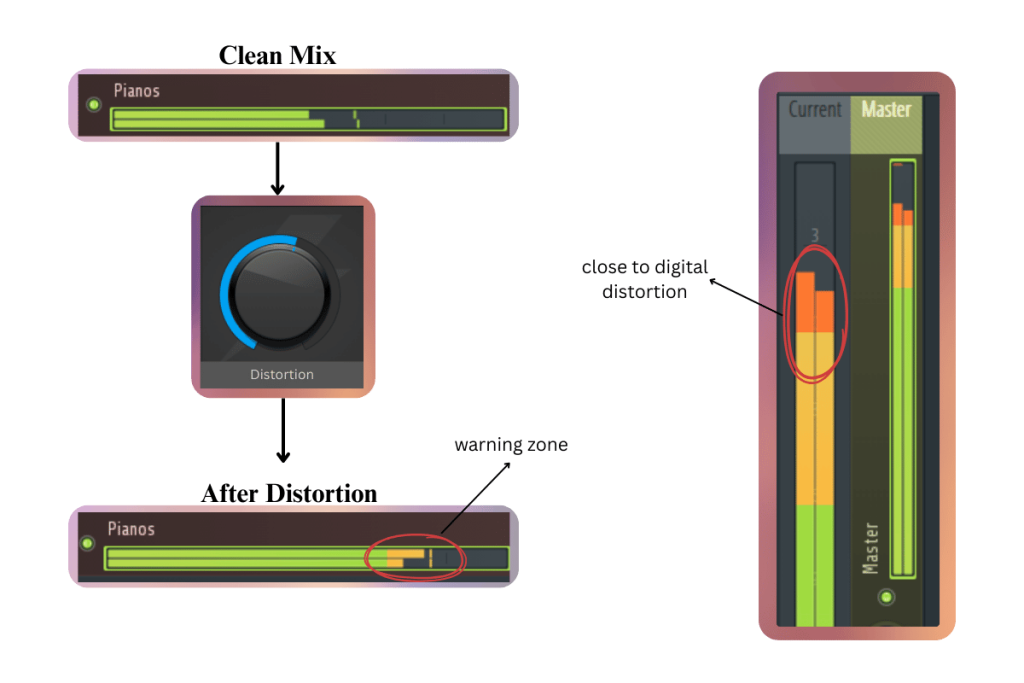
Clipping happens when your audio levels are too high. In digital systems, clipping happens when the signal exceeds 0 dBFS, the highest level your DAW can handle. It can worsen the overall quality of the mix if not addressed before the final mastering step. To identify clipping, look out for red peaks in the loudness meter provided by the DAW.
How can you prevent clipping?
- Keep track levels below 0 dBFS, ideally around -6 dBFS.
- Watch your DAW’s level meters — if you see red peaks, it means clipping is happening.
- Turn down any track that’s too loud, especially before it hits the master bus.
- Be careful with distortion or saturation plugins, which can cause internal clipping if overused.
Fix phase issues and mono-compatibility
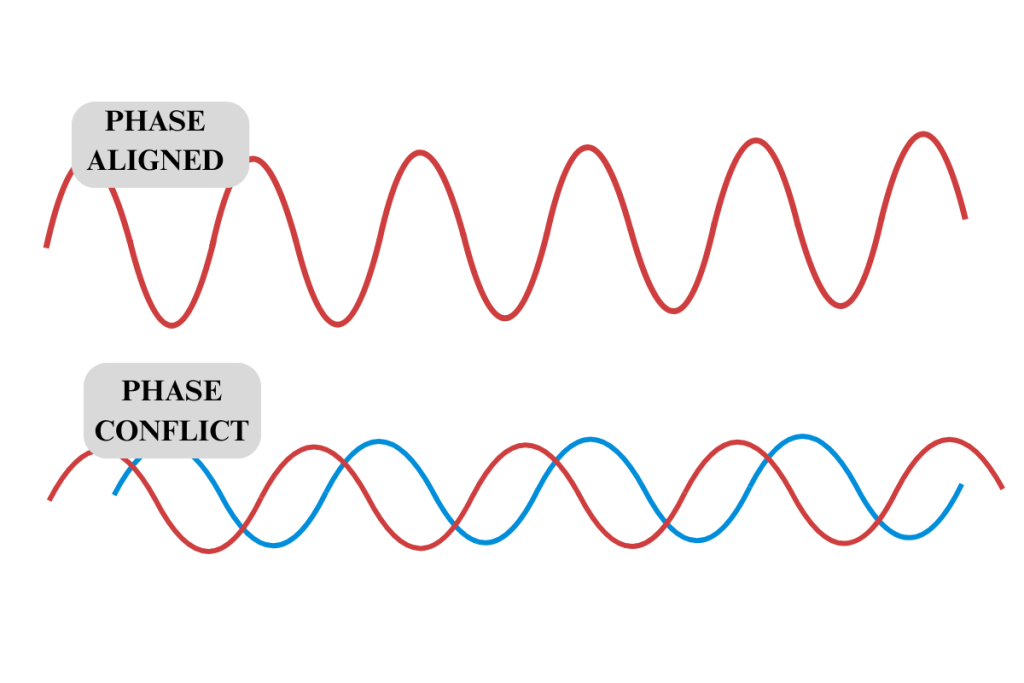
Phase issues happen when two or more tracks (like layered vocals or guitars) are slightly out of sync with each other. This results in parts of the sound getting cancelled out.
Mono compatibility refers to how your mix sounds when played through a mono speaker, like a mobile phone or Bluetooth speaker. If your track sounds weaker, or if vocals, drums, or other key elements seem to disappear when switching from stereo to mono, then your mix likely has phase issues.
How to fix the phase issues?
- To fix phase issues, start by soloing layers and flipping the phase (or polarity) on one of them using your DAW’s phase button. If the sound gets fuller, the phase is out of alignment.
- You can also nudge one track forward or backward by a few milliseconds to better align it.
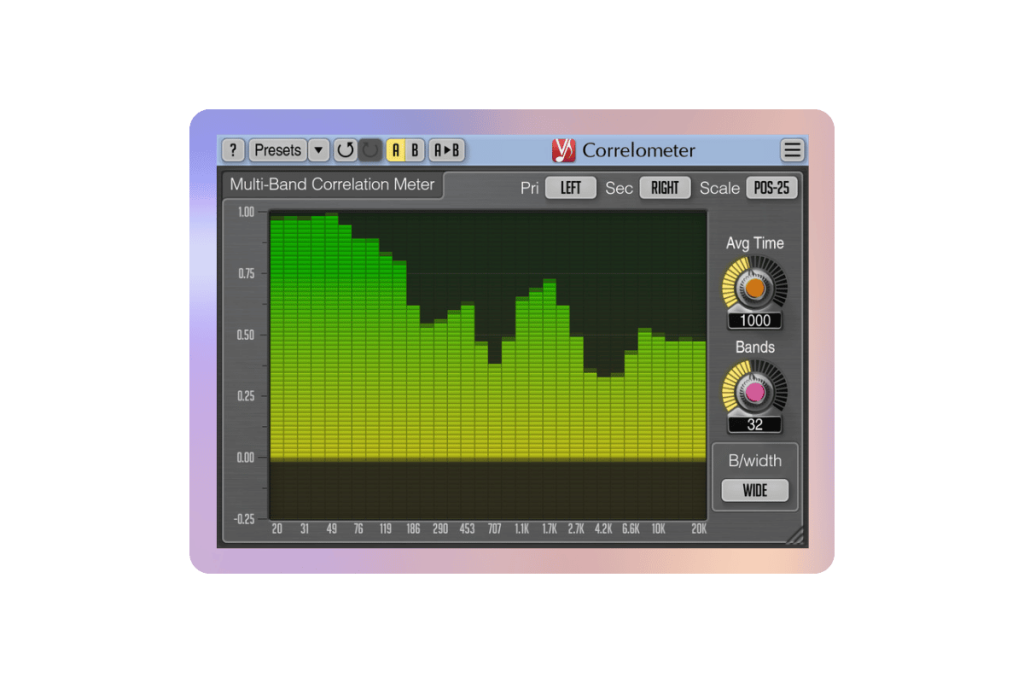
- You can also use a free plugin like Voxengo Correlometer. Add it to your master channel. If the meter shows values close to -1, that means you likely have phase issues.
How to check mono?
- Use a mono button on your master channel. If important elements like vocals or kick drums sound weaker in mono, you likely have phase issues to address.
- Always check mono compatibility before mastering a mix. A good stereo mix should still sound solid when played in mono.
Remove master bus processing
The master bus is where all your tracks come together. Sometimes, effects like limiters, compressors, EQs, or stereo wideners are added here to shape the overall sound. While this can help during mixing, it’s not recommended before mastering a mix.
Why? These effects can:
- Hide mix problems
- Reduce headroom
- Distort dynamics
- Cause clipping or frequency imbalances
Why keep the master bus clean?
Removing processing from the master bus gives the mastering engineer or AI tool full control over loudness, clarity, and tonal balance. It prevents double-processing issues and ensures the dynamics stay natural.
Tip: If you like how your mix sounds with certain effects on the master bus, export two versions: one with processing for reference and one clean version for mastering.
Apply the best export settings
When exporting your mix for mastering, use a lossless format like WAV or AIFF to preserve full audio quality. Set the bit depth to 24-bit or 32-bit float for improved dynamic range, and ensure the sample rate matches your project, typically either 44.1 kHz or 48 kHz.
Avoid adding any processing at this stage. Don’t normalize, dither, or apply effects like limiters, EQs, or stereo wideners. The goal is to maintain a clean and dynamic mix. Audio normalization can be focused in the last stages of the mastering process.
Ensure your final output peaks around -6 dBFS to leave sufficient headroom for mastering.
A clean export with the right settings ensures the mastering stage can do its job effectively, making your track louder, clearer, and ready for release.
Conclusion
Preparing your mix for mastering is essential for achieving a clean, professional sound. Otherwise, your mastering process can turn bad. Correct phase issues, verify mono compatibility, remove master bus effects, clean up audio, prevent clipping, and export with proper settings. These small steps significantly improve the final result. A well-prepared mix allows mastering to enhance loudness, clarity, and balance.