In music production, loudness is measured in three main loudness meters: Peak, RMS, and LUFS. Each of these meters looks at your audio from a different angle. Peak tells you how high the signal jumps at its loudest moment, RMS gives you an average sense of power, and LUFS measures loudness the way people actually hear it. They all measure loudness, but not in the same way, especially when you care about mastering loudness that translates everywhere.
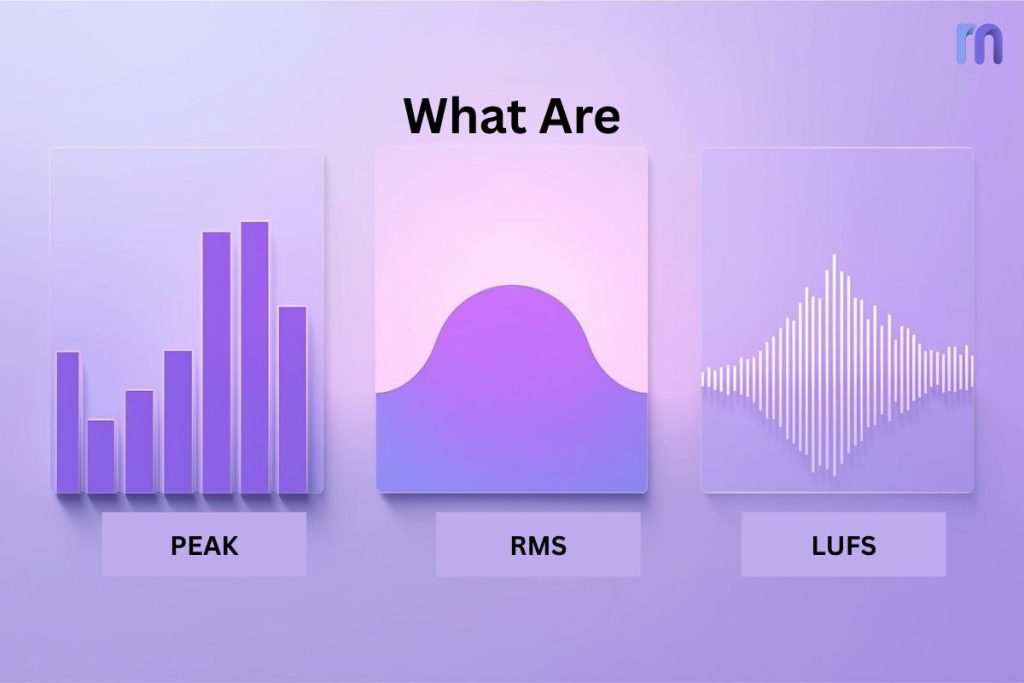
Table of Contents:
What to Prioritize in Mastering?
How loud is my track?
At first glance, the meters can feel like three answers to the above question. But they aren’t interchangeable. A mix that looks safe on a Peak meter may still sound weak, while a track that hits the right LUFS target can distort if you ignore true peaks.
Let’s learn what these parameters mean, how to read them, what affects each of them, and when to use/control them (with expert guidance).
What Is Peak Meter?
In digital audio, a Peak is the highest point your signal reaches at any given moment and helps you avoid clipping at the digital ceiling. Take it as the tallest wave in the ocean; it’s not about the whole sea, just that single wave that hits its maximum height.
Your audio software measures this in decibels relative to full scale (dBFS). At the top is 0 dBFS. This is called the digital ceiling. If your audio tries to cross that ceiling, it clips. Unlike analog gear, digital audio has no safety margin above zero. Once it clips, nothing can restrict you from getting a distortion.
Sample Peak vs. True Peak
When people talk about “Peak,” they often mean Sample Peak. This measures the loudest individual samples in your digital file. But here’s the catch: sometimes, the sound between samples (the reconstructed waveform) can actually go higher. That’s where True Peak comes in.
- Sample Peak: Looks only at digital sample points.
- True Peak (dBTP): Estimates the waveform between samples: vital for catching inter-sample overs that can distort after encoding. This is important because streaming encoders and consumer devices can cause distortion if those hidden peaks exceed 0 dBFS. Read More.
Please Note: Most mastering engineers set a true peak limit at −1.0 dBTP to stay safe across platforms.
What Affects Peak Levels
Peaks don’t just appear randomly. They’re shaped by the sounds and processing in your track. Here are the main culprits that can push them up:
- Transient sounds like snare hits, kick drums, or plosive consonants (“P,” “K,” “T”).
- EQ boosts, especially in the high end, which can push peaks higher.
- Dynamic processing like compression or limiting. These can reduce peak spikes or reshape them.
How to Read Peak on Your Meter
Looking at a peak meter can feel intimidating if you don’t know what to focus on. Here’s how to interpret the numbers in a way that actually helps your mix:
- If the meter flashes red at 0.0 dBFS or above, you’ve clipped.
- If your loudest peaks during mixing sit between −6 dBFS and −3 dBFS, you’ve left enough headroom for mastering.
- Keep your limiter ceiling near −1.0 dBTP True Peak to avoid clipping during streaming encodes.
What Is RMS Meter?
In audio, RMS stands for Root Mean Square, which sounds like complicated math but simply means “average level over time.” If a Peak meter tells you the loudest single moment in your track, RMS shows you how strong and steady the sound feels overall.
Let’s make you understand with an analogy: Suppose, you’re watching waves at the beach. The highest wave is your Peak, as it shows the extreme. But if you want to know how rough the ocean feels when you swim, don’t just look at the tallest wave. You should look at the average height of all the waves together. That’s RMS.
This is why RMS is often linked to perceived loudness. Our ears don’t notice split-second spikes as much as they notice the ongoing energy and body of sound. A track with a high RMS will feel consistently loud and dense, while one with a low RMS may sound thin or weak, even if its peaks are technically high.
How RMS Works
If Peak is instant, RMS is patient. It calculates the square of the waveform, takes an average, then applies a square root. The main idea is that RMS reacts slower and gives you a sense of ongoing loudness rather than split-second jumps.
That’s why a sustained pad or bass line will raise RMS more than a sharp snare hit.
What Affects RMS Levels
RMS doesn’t float randomly. it’s shaped by your production choices. Here are the big factors that push it up or down:
- Compression and limiting: These reduce peaks, so the average loudness (RMS) rises.
- Sustained instruments: Pads, bass, and vocals keep RMS higher than short bursts.
- Arrangement density: More instruments layered together raise RMS naturally.
How to Read RMS on Your Meter
RMS values move slower, so they’re easier to follow than peaks. Here’s how to think about them:
- A low RMS (around −20 dBFS) will sound thin or soft.
- A moderate RMS (around −14 to −10 dBFS) feels full and balanced.
- A high RMS (around −8 dBFS or higher) can start to feel dense or fatiguing.
Just remember, these aren’t hard rules. Different genres have different sweet spots.
What Is LUFS Meter?
LUFS stands for Loudness Units relative to Full Scale. It’s the modern standard for measuring loudness, designed to reflect how humans actually hear sound. Unlike Peak (which shows the highest moment) or RMS (which shows the average power), LUFS takes into account the way our ears perceive different frequencies and how we experience sound over time.
To break it down further, LUFS is based on the concept of a Loudness Unit (LU). One LU is equal to one decibel in change, but the difference is that LUFS is “ear-weighted” using something called the K-weighting filter. This means the meter doesn’t treat all frequencies equally; it emphasizes mid-range (where our ears are most sensitive) and pays less attention to extreme lows or highs.
Another important part of LUFS is gating. Very quiet moments (like fades or silences) don’t drag the overall reading down. This makes LUFS much more accurate for understanding how listeners actually experience your track. In short,
- LU = the unit of loudness change
- LUFS = the scale that shows loudness compared to digital full scale (0 dBFS)
This is why LUFS has become the standard for streaming platforms like Spotify, YouTube, and Apple Music. They all normalize playback using LUFS values, not just Peak or RMS. So, if you want your track to sound consistent across different platforms, LUFS is the number you can’t ignore.
How LUFS Works
LUFS isn’t a single number. Rather, it gives you different time-based views:
- Integrated LUFS (I): The overall loudness of the entire track.
- Short-Term LUFS (S): A 3-second window, useful for checking sections like choruses or verses.
- Momentary LUFS (M): A super-short 400 ms window, showing instant changes.
This layered view makes LUFS the most practical meter for mixing and mastering. Integrated tells you the “final loudness,” while Short-Term and Momentary help spot problem spots.
What Affects LUFS Levels
Because LUFS is perception-based, it reacts to more than just volume:
- Compression and limiting: Make your music consistently louder, raising LUFS.
- Frequency balance: Extra mids push LUFS up more than bass-heavy mixes.
- Sustained vs. transient sounds: Long, steady sounds raise LUFS more than quick hits.
This is why two tracks with the same Peak and RMS can have very different LUFS readings.
How to Read LUFS on Your Meter
LUFS meters look busy at first, but here’s how to keep it simple:
- Integrated LUFS (I): Use this as your final target. Streaming platforms normalize to around −14 LUFS, though some genres push louder (−10 to −8 LUFS).
- Short-Term LUFS (S): Compare sections. If your verse is −16 LUFS and your chorus is −12 LUFS, that dynamic lift feels exciting.
- Momentary LUFS (M): Watch for sudden spikes that might feel harsh.
Suppose you master a song at −9 LUFS Integrated with peaks at −1.0 dBTP. On Spotify, it gets normalized down to −14 LUFS. Another track mastered at −14 LUFS sits right beside it in the playlist; both play back at the same loudness. The louder master doesn’t sound “bigger” anymore; it just lost punch because of over-compression.
What to Prioritize in Mastering? Peak, or RMS, or LUFS?
For modern mastering, LUFS matters most because streaming platforms normalize playback based on it. Set a sensible Integrated LUFS for your release, check Short-Term LUFS so choruses lift, and verses breathe, and control True Peak so the master survives encoding. Use RMS to judge body and density, not as a delivery target.
- Hit your LUFS goal: Use Integrated for the whole track and Short-Term to balance sections.
- Respect True Peak: Keep the limiter ceiling near −1.0 dBTP to avoid inter-sample distortion.
- Sanity-check RMS: Aim for full and punchy, not thin or squashed.
If you skip LUFS, platforms will change your level. If you skip True Peak, you risk harsh artifacts after encoding. If you skip RMS, the master may feel weak or fatigued. Use all three but let LUFS (with True Peak control) guide your final loudness.
Conclusion
Decide the listening context first, then set Integrated LUFS for the platform, cap True Peak dBTP to stay clean, and use RMS to confirm the perceived loudness feels musical. Then let the meters serve that goal. Build a simple habit: set a consistent monitor level, A/B against a reference playlist at matched loudness and audition your master on small speakers and earbuds to judge real-world punch and clarity. If your music lives both online and on stage, don’t be afraid to make two deliverables (streaming-friendly LUFS with −1.0 dBTP, and a louder club version that preserves punch).
Finally, do a post-export check: re-import the file, confirm LUFS and true peak, and listen for encoder artifacts. Ear first, meters second, used together, they’ll help you deliver impact without surprises.