Many creators struggle with sample rate and bit depth. These terms often sound confusing. But they play a big role in your audio quality. If your sound is distorted or clipped, wrong settings could be the cause. This blog breaks down what sample rate really does, how it works with bit depth, and how both affect your audio quality. With simple tips and examples, you’ll understand how to record clean audio. No complex terms. Just clear advice for better, distortion-free sound.
Table of Contents:
What Is Bit Depth and Why It Matters?
Sample Rate and Bit Depth — What’s the Connection?
Best Settings to Avoid Audio Clipping
Best Practices for Clean Digital Audio
What Is Sample Rate?
Sample rate is how many times per second your audio is measured or “sampled” when converting sound into a digital file.
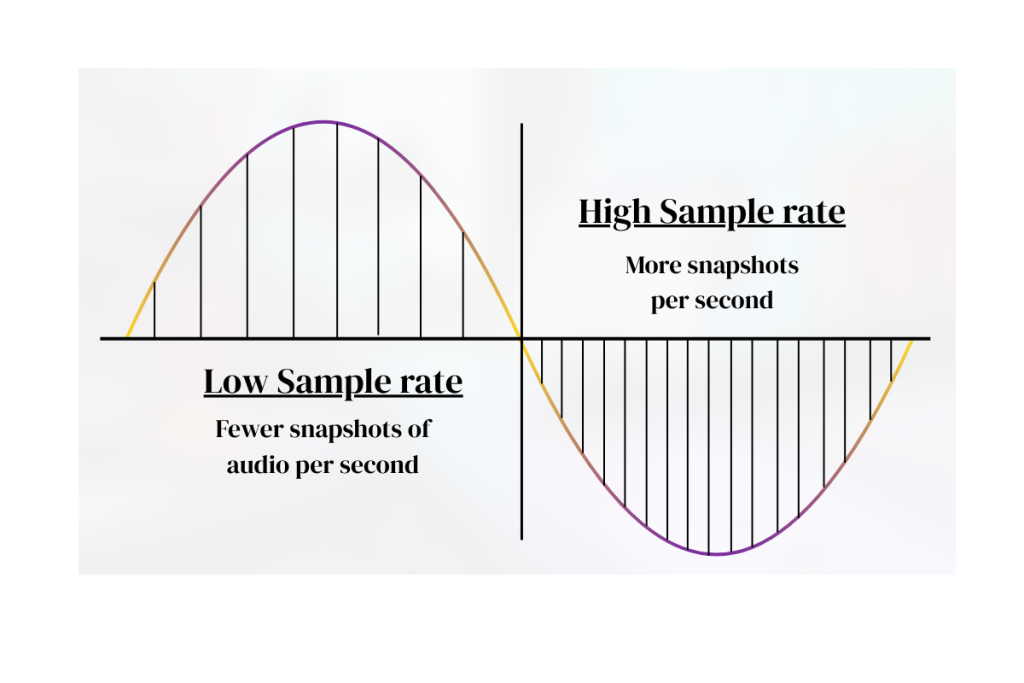
Think of sound like a wave. To turn that wave into digital audio, your system takes tiny snapshots of the wave’s height (volume) over time. The sample rate tells you how many of those snapshots happen every second.
Sample Rate in Simple Terms
Sample rate is measured in kHz, which means “thousand times per second.”
For example:
- 44.1kHz = 44,100 snapshots per second
- 48kHz = 48,000 snapshots per second
- 96kHz = 96,000 snapshots per second
More snapshots capture more detail in the sound, especially in the high frequencies.
Why Sample Rate Matters
The sample rate affects the frequency range your digital audio can reproduce.
A good rule: the highest frequency you can capture is half the sample rate.
- At 44.1kHz, you can capture up to ~22kHz (just above human hearing).
- At 96kHz, you can capture up to 48kHz (way beyond human hearing).
Example:
Let’s say you’re recording a vocal for a podcast.
Using 44.1kHz captures the full vocal range clearly.
If you record at 22kHz, the vocal will sound dull and incomplete because it misses important high frequencies.
In most cases, 44.1kHz or 48kHz gives enough detail and is much better to use than going for higher sample rates. Higher sample rates can be useful, but they also use more CPU and storage.
What Is Bit Depth and Why It Matters
Bit depth controls how much volume detail your digital audio can capture. It affects how quiet or loud a sound can be without losing quality.
When audio is recorded, each audio sample doesn’t just measure when it happens (that’s the sample rate)—it also measures how loud it is. That loudness is stored using bit depth.
Bit Depth in Simple Terms
Think of bit depth like a camera’s ability to capture shades of light.
More bits mean more steps between silence and full volume.
- 16-bit = 65,536 volume levels
- 24-bit = Over 16 million levels
- 32-bit float = Almost unlimited detail
Why Bit Depth Helps
Higher bit depth gives a better dynamic range—the difference between the quietest and loudest sound.
It also lowers the noise floor, so quiet sounds stay clean.
With higher bit depth, recordings sound smoother and have more headroom.
Example:
Suppose you’re recording a soft acoustic guitar part.
If you use 16-bit, the quietest notes might get lost or sound hissy.
With 24-bit, those soft details come through clearly, without background noise.
And if the volume jumps suddenly, 24-bit gives you enough headroom to avoid distortion.
Sample Rate and Bit Depth — What’s the Connection?
Sample rate and bit depth work together to shape the quality of your digital audio. While sample rate controls how often an audio sample is captured, bit depth controls how detailed each sample is.
Two Parts of the Same Process
Think of recording audio like drawing a curve on graph paper:
- The sample rate sets how many dots (samples) go across the timeline.
- The bit depth decides how high or low each dot can be placed (volume detail).
Together, they define your audio sample rate quality.
Balanced Settings Work Best
Using a high sampling rate with low bit depth makes no sense—it captures lots of frequency detail but poor volume resolution.
Likewise, high bit depth with a very low sample rate misses important sound frequencies.
For most creators, 24-bit and 44.1kHz or 48kHz give the best balance of quality and performance.
Example:
In most DAWs like Ableton Live, Logic Pro, or FL Studio, you’ll find recording settings like 24-bit / 44.1kHz or 24-bit / 48kHz. These are ideal for music or podcasting. Some DAWs also support 32-bit float, useful for live sessions where unexpected loud peaks might occur. Always match your settings to your project type.
Best Settings to Avoid Audio Clipping
To get the most headroom and avoid audio clipping, use 24-bit or 32-bit float for your recordings. These bit depth settings give you more volume space, so even loud peaks won’t distort easily. More headroom means you can record safely without setting input gain too low or too high.
Clipping happens when the volume goes beyond what the system can handle. Bit depth directly affects this by offering more steps between quiet and loud sounds. 32-bit float is even safer as it can handle extremely loud or soft sounds without digital clipping.
The sample rate doesn’t impact clipping. It only affects how detailed the sound is over time. So, recording at 44.1kHz or 48kHz is usually enough.
Best Practices for Clean Digital Audio
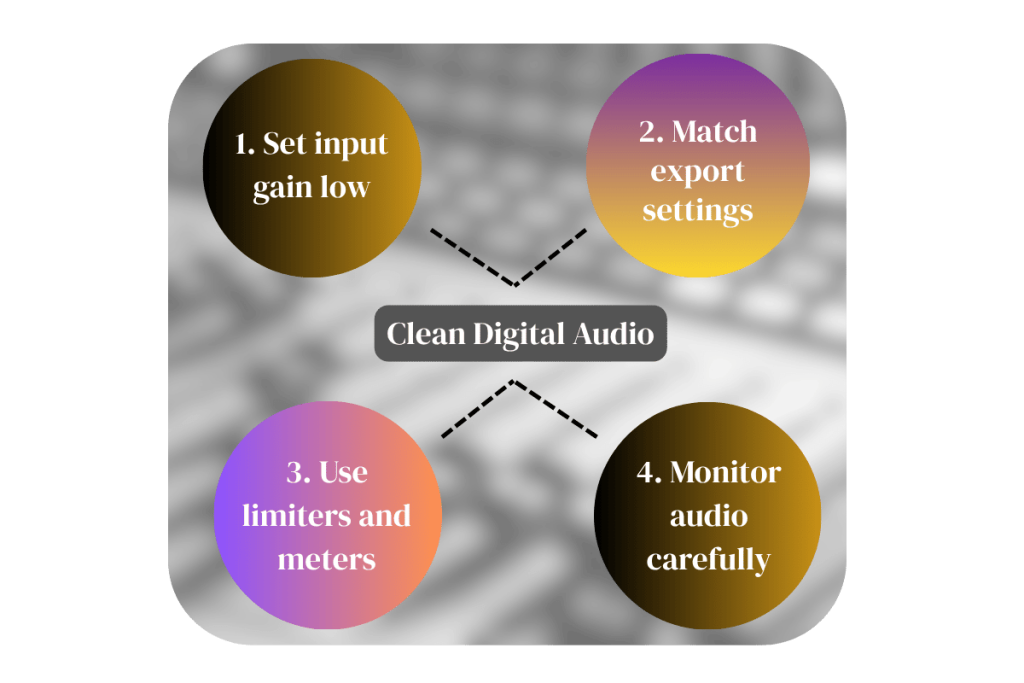
To get clean, clear recordings, your technique matters just as much as your sample rate and bit depth settings. Follow these simple habits to avoid audio clipping, noise, and distortion.
H3: Keep Input Gain Conservative
Set your input gain so the loudest part of the sound peaks around –12dB to –6dB. This leaves headroom and prevents clipping. Never push it close to 0dB during recording.
H3: Use Limiters and Meters
A limiter catches loud peaks before they clip. Place it on your input or master channel when recording unpredictable sources like vocals or live instruments. Also, use peak and RMS meters to watch volume levels in real time.
H3: Monitor Your Audio Samples
Always listen back to your recordings with good headphones or speakers. Check for background noise, pops, or distortion. Zoom into your waveform to see if any audio samples are cut off (clipped).
H3: Export With Matching Settings
When bouncing your track, use the same sample rate and bit depth you recorded with—typically 24-bit / 48kHz. This keeps quality intact. For final delivery (like MP3 or CD), convert carefully and use dithering when reducing bit depth to 16-bit.
Final Thoughts
Understanding sample rate and bit depth is key to recording clean, professional audio. Use a 24-bit depth for more headroom and clarity. Stick to 44.1kHz or 48kHz sample rate for most projects. Always monitor your audio samples, use meters, and export with consistent settings. These simple choices help avoid audio clipping, reduce noise, and improve your final sound, whether you’re recording music, voice, or any other form of digital audio.