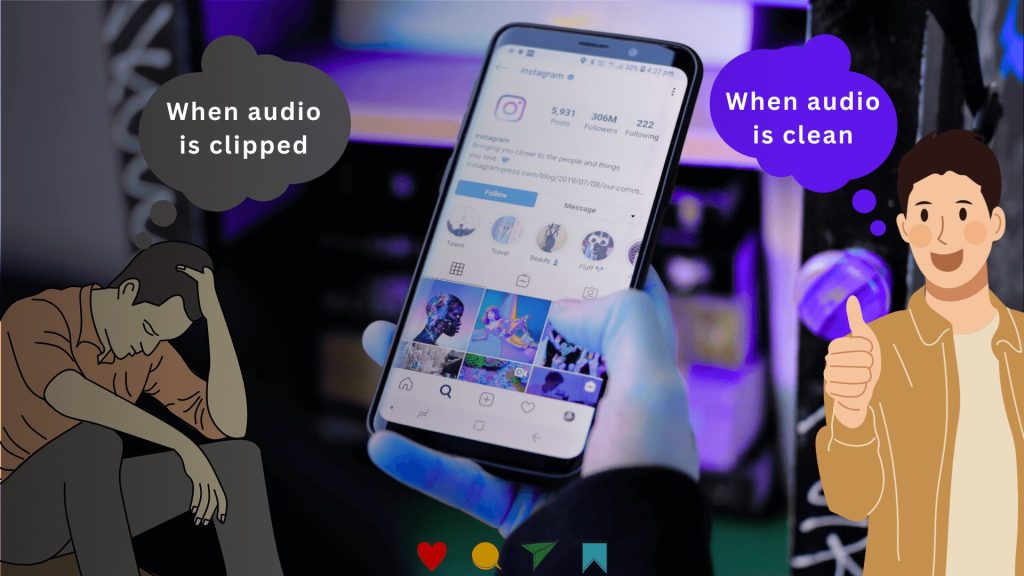
Instagram reels are now a new norm of leisure time, especially for younger generations. Elders are unable to restrict themselves from the reels’ attraction. That simply means, reels have been adopted as a medium of commerce, marketing, sales, or personal branding. And there is a remarkable growth in production and consumption of these audio clips for reel contents.
Suppose, with the same kind of intention, you’ve recorded a reel. The visuals are perfect. Your branding ideas are also. But have you taken care of the audio? If it’s full of crackles and a harsh sound, that will cause audio clipping. Audio clipping is a common issue that ruins otherwise good content.
Audio Clipping occurs when the sound becomes too loud for your microphone to handle.
If you’re using reel songs, recording voice-overs, or talking to the camera, chances are higher to get that audio clipped. That will eventually result in making sounds unprofessional and distracting, in spite of your efforts. But there are ways to solve this, even for influencers with less technical knowledge.
Table of Contents
Why Audio Clipping Happens in Instagram Reels
How to Prevent Audio Clipping?
Frequently Asked Questions by Instagrammers
What is Audio Clipping?
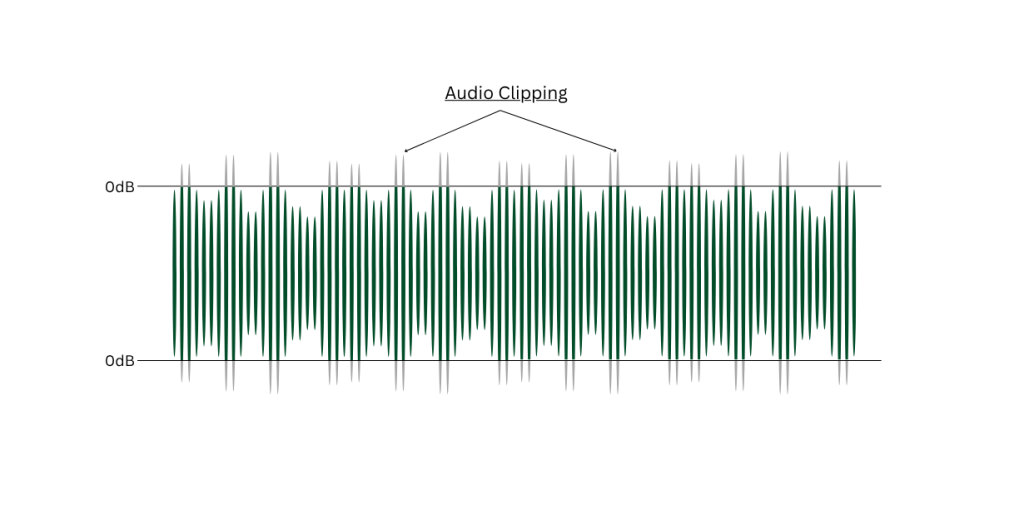
Audio clipping is a kind of distortion to your recorded waveform. It happens when your microphone gets overwhelmed by a sound that’s too loud. In simple language, when the recording device can’t handle excessive audio input, it causes the signal to be clipped. The result is a fuzzy sound in your recording.
Audio clipping happens for the bedroom artists, primarily. Because they are either beginners or have low-budget recording setups. That’s why their recordings seem to be buzzing, or even complete drops in voice or music. If the same case happens to you, too, your reel is not going to achieve the target you wished for.
Before you solve the issue, you should know more about it. Let’s learn briefly what causes Instagram reels get clipped.
Why Audio Clipping Happens in Instagram Reels
Audio clipping is especially common in short-form content like Instagram Reels. It’s NOT always the creator’s fault. Rather, it often happens because mobile devices and social platforms like Instagram handle the reel static sound. Here’s a breakdown of the main reasons:
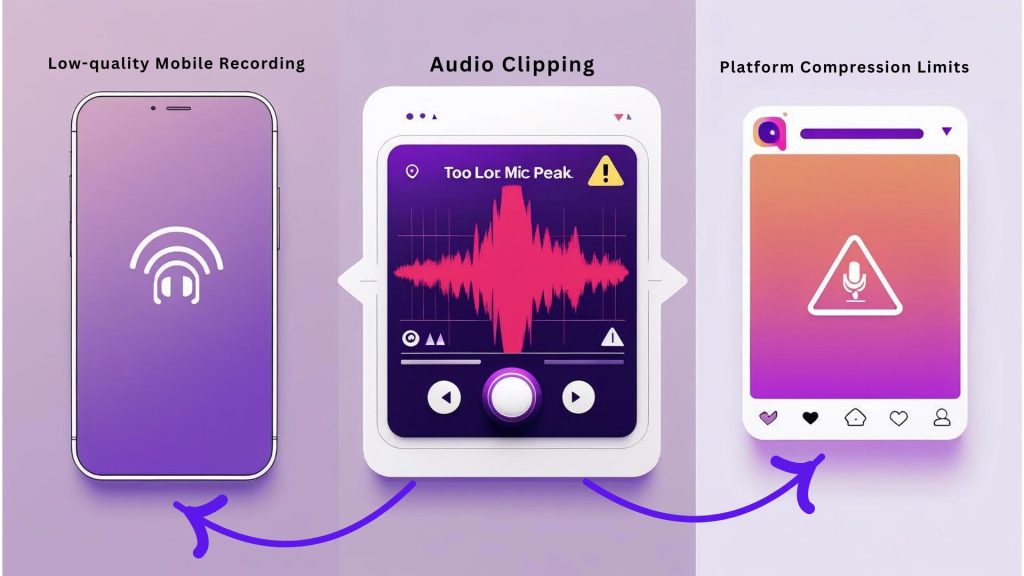
1. High Input Levels from Mobile Microphones
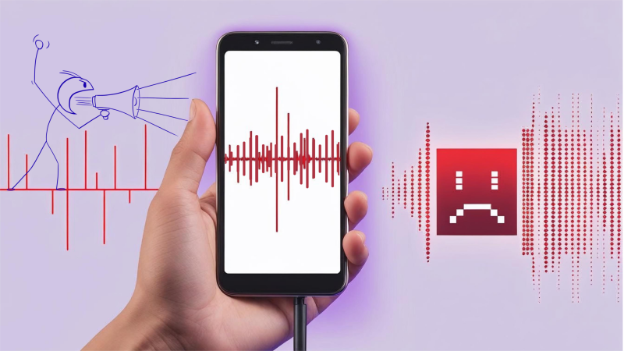
Smartphones have tiny built-in microphones. They aren’t designed for loud or dynamic audio. If you sing, shout, or record something with sudden volume spikes, the mic input may max out. Once it hits the limit, the audio gets clipped and distorted.
2. Recording Too Close or Too Loud
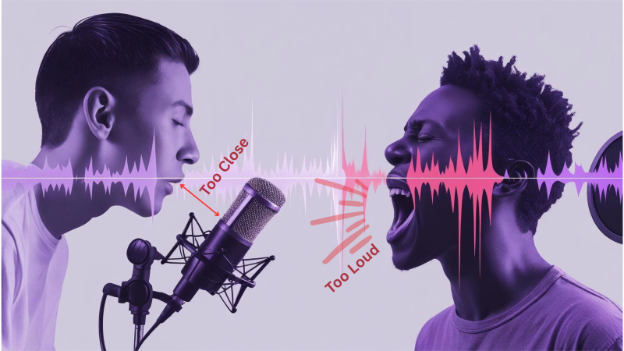
Holding the phone too close to your mouth or recording loud vocals can lead to sound clipping. Your voice may sound fine in the room, but your mic hears it too intensely. This causes those unwanted crackles or buzzes that ruin your Instagram audio.
3. No Real-Time Monitoring
Unlike professional setups, phones don’t allow you to monitor audio levels in real-time. That means you won’t know if your reel’s audio is clipping until after you hit “Post.” If you’re recording fast-paced content or reacting in the moment, this lack of feedback makes things worse.
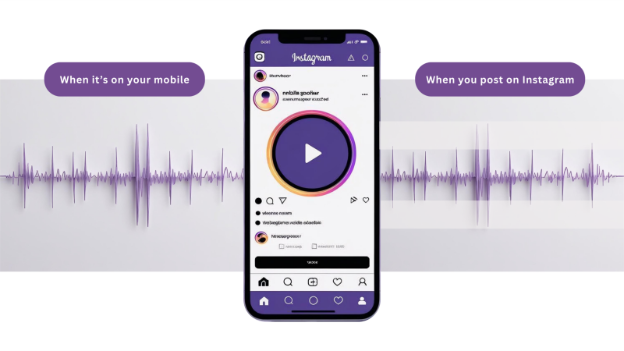
4. Compression and Processing by Instagram
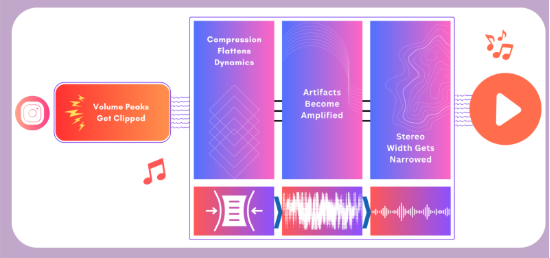
Instagram applies automatic compression to your reel’s audio. If your original recording is already close to peaking, this compression pushes it further, making harsh noise, distortion, or other audio artifacts even more noticeable in the final Reel. That’s why reel mastering is required before you post it on Instagram or Facebook.
How to Prevent Any Kind of Audio Clipping
Even if you’re recording Reels on your phone, you can still get clean, clear audio—free from audio clipping, distortion, or harsh noise. The key is combining a good setup with platform-aware recording habits. Then, use a tool like Remasterify to polish and enhance your audio in the final step.
Get Your Setup Right
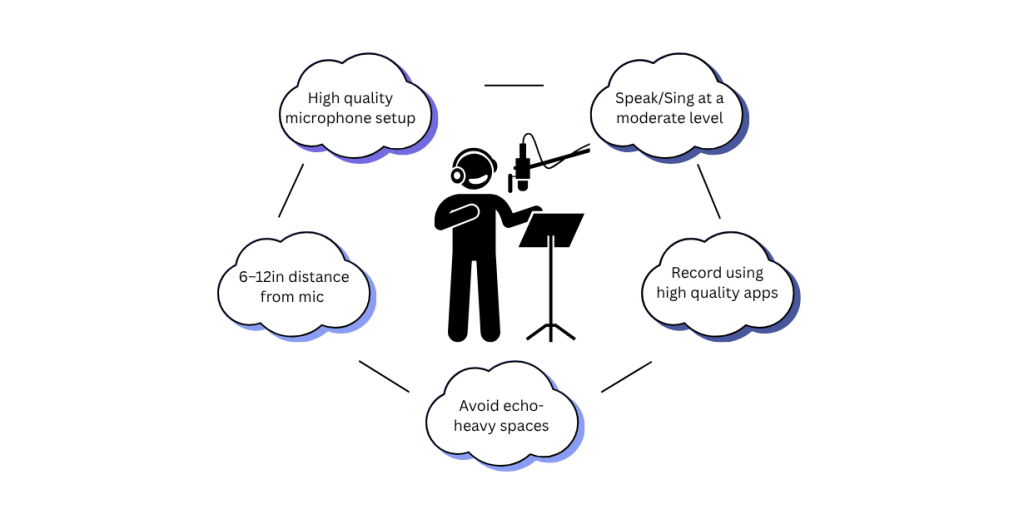
The first step in preventing sound clipping is to control your recording environment. That doesn’t mean you need a full studio—just a few smart adjustments.
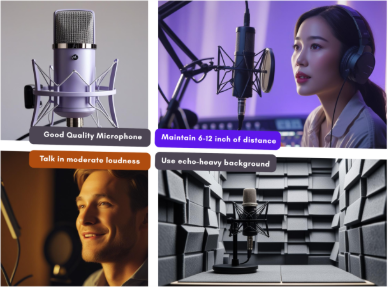
- Keep the mic or phone 6–12 inches from your mouth. This avoids overwhelming the microphone when speaking or singing.
- Buy a suitable gear that prevents audio distortion. Investing in an appropriate gear can go a long way in achieving high-quality audio. Check out RODE’s Wireless GO II.
- Speak at a moderate level. Yelling or singing loudly directly into your mic increases the chances of distorting your reel’s audio.
- Avoid echo-heavy spaces. Recording in a quiet, acoustically treated space minimizes background noise. If you’re on a tight budget, blankets, curtains, or even a rug help soften reflections.
Also, consider doing a test recording before filming your full Reel. If the waveform appears to be “hitting the ceiling” (with flat tops), you’re experiencing clipping.
Record Smarter for Instagram
Instagram audio is automatically compressed by the platform. If your audio is already loud or borderline clipped, this compression will make it worse.
Here’s how to work around it:
- Understand Instagram’s Compression – Recording at higher sample rates and bit depths can provide more data for compression algorithms to work with, preserving quality. Read this blog to learn more about Instagram Compression.
- Record outside of the Instagram app using your phone’s native camera or a voice memo app. These offer better audio control. You can also use Easy Voice Recorder or Apple Voice Memos
- Avoid adding loud music on top of your voice without adjusting volume levels. Layering reel songs without mixing leads to distorted audio.
- Export and adjust the audio separately, if possible, then re-upload it to Reels.
Understanding these platform quirks helps you stay ahead of unexpected audio artifacts.
Overcome Clipping Fast with Remasterify

Even with a good setup, things happen. Maybe your energy spiked mid-take, or background noise crept in.
You can start by visiting Remasterify.com and uploading your file (MP3, WAV, or MP4). Remasterify instantly analyzes your sound and applies an intelligent mastering process.
To specifically tackle audio clipping, you can:
- Adjust the Mastering Intensity Dial – Lower it slightly if you suspect clipping. This helps control loudness and reduces the chance of harsh peaks getting amplified.
- Use the Noise Reduction Dial – Slide it up just enough to clean up background hiss or hum. This makes clipped audio less distracting.
- Turn on Automatic Equalization – Smooth out frequency spikes and soften sharp, clipped areas for a more balanced sound.
- Preview and export your file – Listen to the result, and if it sounds clean, download the mastered version—ready for your next Instagram Reel.
You can also explore features like AI model selection, stereo widening, reference track upload, and metadata editing for further enhancement. With these quick steps, Remasterify helps restore balance and clarity to your audio.
Conclusion
Audio clipping can ruin great content, especially on fast-moving platforms like Instagram Reels. But with the right setup, smart recording habits, and a reliable post-production tool, it’s easy to avoid.
Start by managing your mic distance, volume levels, and environment. Record outside the app for better control, and keep Instagram’s audio compression in mind.
When you need that final polish, Remasterify is here to help—cleaning up clipping, reducing background noise, and enhancing loudness with a few simple tweaks.
Great audio makes your content stand out. Make sure yours does.
Frequently Asked Questions by Instagrammers
Why does my Instagram Reel audio sound distorted or crackly?
Most of the time, distorted or crackly Reel audio happens because the sound is too loud for your phone mic, so it clips. Clipping is when the audio signal hits its limit and the loud parts get “cut off,” which creates a harsh, fuzzy sound. Instagram can also compress your audio during upload, which can make clipping and harshness sound even worse.
Fix it:
- Record 6–12 inches away from the mic
- Speak at a normal volume (don’t shout)
- Record in a quiet room (soft furnishings help)
- Record outside Instagram (camera app or Voice Memos), then upload
- If the audio is already clipped, use a tool like Remasterify to soften harsh peaks and improve clarity
What is audio clipping on Instagram Reels (and how do I stop it)?
Audio clipping is distortion caused when your mic records sound that’s too loud. Instead of capturing the full sound wave, the loud peaks get cut off, so your voice sounds buzzy, crunchy, or broken.
To stop clipping in Reels:
- Keep the phone/mic 6–12 inches from your mouth
- Don’t speak directly into the mic—aim slightly off to the side
- Record in a quiet space (avoid echoey rooms)
- Record with your camera app or a voice recorder, then upload to Instagram
- Before posting, run the audio through Remasterify to reduce harsh peaks and smooth out distortion
How do I fix bad Instagram Reel audio recorded with my phone mic?
Phone mics struggle with loud voices, wind, echo, and background noise. So reels can sound muffled, noisy, or distorted. The best fix is improving the recording and cleaning the audio before uploading.
Do this:
- Record your voice in Voice Memos (iPhone) or a recorder app on Android
- Hold the mic 6–12 inches away and don’t talk too loudly
- Record in a room with less echo (curtains, sofa, carpet helps)
- If possible, use an external mic for cleaner voice
- After recording, use Remasterify to reduce noise, improve loudness, and make speech clearer.
Then sync the cleaned audio back to your video and upload.
Can you fix clipping in audio after recording an Instagram Reel?
Yes, clipping can often be reduced, but it can’t always be removed 100% because the loud parts were already “cut off.” Still, you can make clipped audio sound much smoother and more listenable.
How to improve clipped audio:
- Lower harsh peaks (so the crackle is less obvious)
- Smooth distortion in loud words
- Reduce background noise so the voice sounds cleaner.
Tools like Remasterify can do this by adjusting peaks and improving overall clarity before you re-upload your Reel.
Why does Instagram make my audio sound worse after uploading?
Instagram compresses audio to keep files small and stream smoothly. If your original audio is already too loud, noisy, or clipped, compression can make it sound harsher, thinner, or more distorted.
To avoid bad sound after upload:
- Record at a normal volume (don’t try to “sound loud”)
- Keep the mic 6–12 inches away
- Record outside Instagram (camera app / Voice Memos), then upload
- Avoid echo and noise (quiet room, soft surfaces)
- Clean and balance your audio with Remasterify so Instagram compression has less to ruin.