Mixing is both a creative and technical job. Even skilled mixers can run into two common problems: over-EQing and harsh frequencies. At first, they can seem like the same issue because both make your mix unpleasant to hear. But they’re not the same. Over-EQing is about how much and how aggressively you use equalization, while harsh frequencies are about what’s in the sound itself. Each needs a different way to fix it, and using the wrong approach can make things worse.

In this guide, we’ll break down what each problem really is, why they happen, how to hear the difference, and practical ways to fix and prevent them. By the end, you’ll know how to keep your mix bright, clear, and natural without over-processing it.
What is Over-EQing?
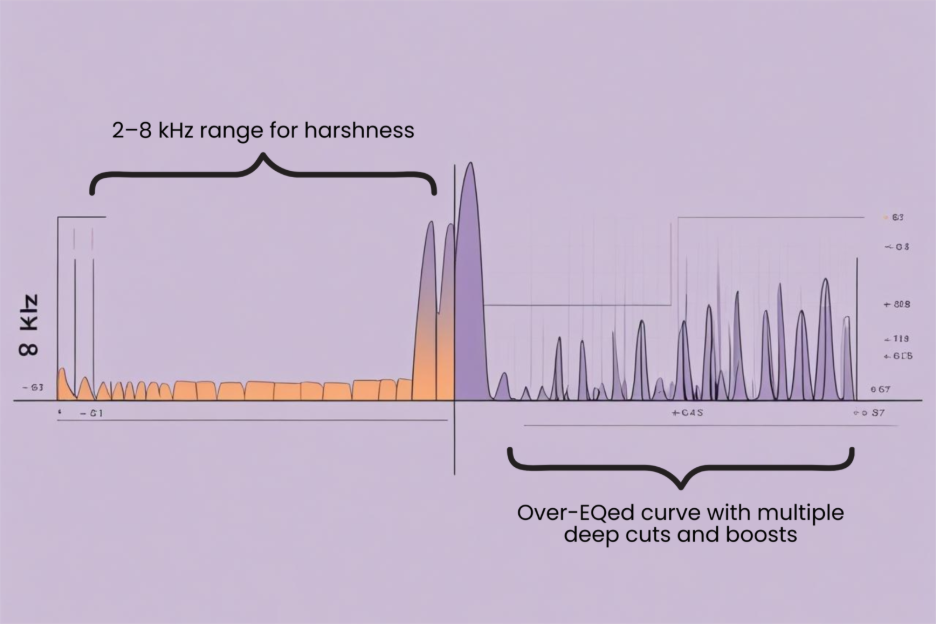
Over-EQing is when EQ changes are applied so heavily that they damage the natural tone of the track. Instead of enhancing the sound, it ends up removing its depth and realism.
This usually happens for 3 reasons: (1) you boost or cut too many frequencies, (2) use several EQ plugins in a row, or (3) make large adjustments without a clear purpose. For example, stacking three EQs on a vocal, each making multiple deep cuts and high boosts, can make the voice sound thin and lifeless. Over-Equalizing often sneaks in when you try to “fix” problems that should be solved at the recording stage, like mic placement or room acoustics.
How are Harsh Frequencies?
Harsh frequencies are unwanted tonal peaks. These usually sit in the 2 kHz–8 kHz range. These are the sharp, brittle sounds that make listening uncomfortable and cause ear fatigue.
They often show up in vocals, cymbals, electric guitars, and other bright instruments. harsh audio can come from many sources, a microphone that’s too bright, (2) a reflective recording room, or (3) mix choices like boosting treble too much. Unlike over-EQing, harsh frequencies ies aren’t about how you’ve used EQ, but about what’s already in the audio. Even a track with minimal EQ can still have harshness if it was captured or processed in a way that exaggerates those upper-mid tones.
Why These Problems Happen
| Cause of Over-EQ | Cause of Harsh Frequencies |
| Trying to “fix” poor recordings with extreme EQ moves Chasing a bright or modern sound without reference tracks Layering EQ changes across multiple plugins or channels Mixing with tired ears, which often leads to overcompensation | Bright microphones or pickups that emphasize upper mids Rooms with reflective surfaces that boost certain frequencies Compression settings that push high-mids forward Overuse of treble boosts or exciters without balancing the low-mids |
How to Hear the Difference between Over-EQ & Harsh Frequencies?
Spotting the problem by ear is the first & foremost skill to develop. These two issues have distinct “signatures” if you know what to listen for.
Identifying Over-EQing in Your Mix
- The track sounds unnatural or overly processed, as if the original performance has been filtered through too many layers. This can make instruments and vocals feel distant or synthetic.
- The tonal balance is hollow or uneven across the frequency spectrum. Some areas may feel scooped out, while others are exaggerated without purpose.
- Instruments lose body and warmth, even when there’s no harshness present. For example, an acoustic guitar might lose its rich midrange and sound flat.
Easy Tip: Compare your mix to the raw, unprocessed track. If the unprocessed version feels more alive, balanced, and connected to the rest of the arrangement, you’ve likely over-EQed. This side-by-side check can quickly reveal if you’ve stripped away too much of the natural tone.
Identifying Harsh Frequencies in Your Mix
- Certain notes or consonants, especially “S,” “T,” or “Sh” sounds in vocals, feel sharp and unpleasant. These spikes can make a track tiring to listen to for long periods.
- Cymbals, violins, distorted guitars, or even some synths can sound piercing, even when played at moderate volumes. This is often a sign that the upper midrange is too dominant.
- Ear fatigue sets in quickly, especially when listening to headphones, because harsh tones hit directly and repeatedly.
Easy Tip: Play your mix at a low volume. Harsh frequencies will still jump out and feel uncomfortable even when quiet, while over-EQing usually becomes less obvious at lower listening levels. This quick check helps you confirm if harshness is the real issue.
How to Fix over-EQing (without losing natural tone)
If you’ve pushed EQ too far, the solution isn’t to add more tweaks, it’s to step back, strip things down, and rebuild with a lighter hand.
Reset and Reassess
Bypass all your EQ plugins and listen to the raw track. Ask yourself if the problem is truly tonal or if it’s caused by something else, like the recording quality, mic placement, or performance. Many “EQ problems” vanish when you fix them at the source. For example, moving a microphone slightly off-axis can reduce brightness without touching a single EQ knob.
Use Subtractive EQ Sparingly
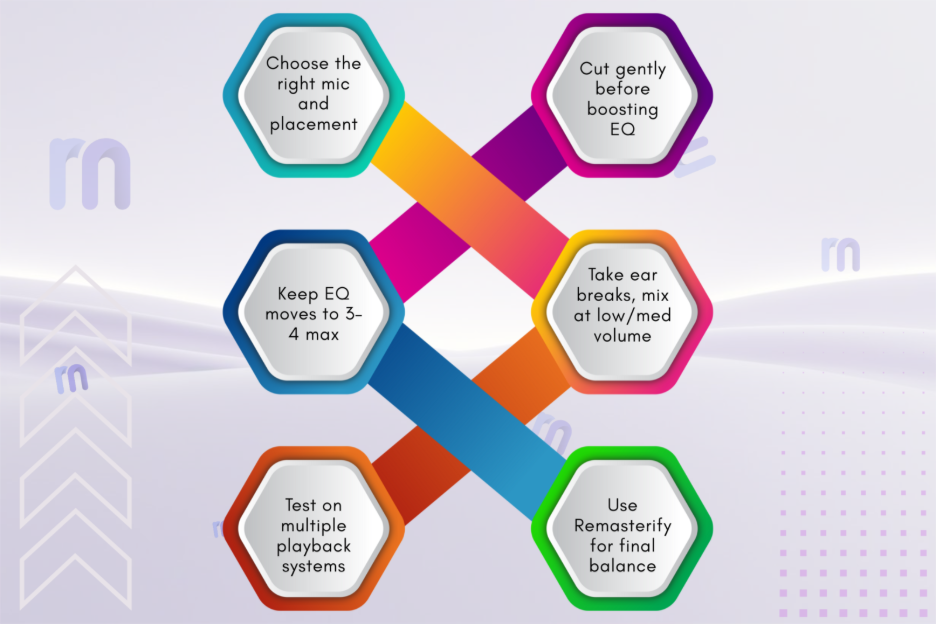
When you do need to use EQ, focus on cutting problem areas instead of boosting. Small, precise cuts, like removing 2 dB at a harsh frequency, often work better than boosting 6 dB somewhere else to “balance” the tone. This approach preserves the track’s natural body and avoids the artificial feel that heavy boosts can create.
Keep EQ Moves Minimal and Purposeful
Aim for only three or four meaningful EQ adjustments per track. Each move should solve a specific issue, such as removing muddiness in the low-mids or taming nasal tones in the upper-mids. Random tweaks just to “improve” the sound often lead back to over-EQing. Over time, this disciplined approach builds mixes that are cleaner, more transparent, and easier to listen to.
How to Fix Harsh Frequencies (without dulling the mix)?
When harshness creeps into your mix, the goal isn’t to slash away at the highs until everything sounds muted. If the highs are too harsh, EQ needs to be used with precision rather than broad cuts. Harsh tones need careful, targeted control. You can remove the sting while keeping the mix bright and lively.
Pinpoint the Offending Frequency
Start by using a narrow EQ boost (about 6–10 dB) and slowly sweep between 2–8 kHz. Listen for the exact spot where the harshness jumps out, it could be around 3 kHz for sharp vocals or closer to 7 kHz for piercing cymbals. Once you find it, cut gently, often 1–3 dB is all you need.
Use Dynamic EQ or a De-Esser
Dynamic EQ works only when the harshness appears, letting the brightness come through the rest of the time. A de-esser is perfect for taming vocal sibilance but can also control sharpness in cymbals, violins, or electric guitars without flattening the whole track.
If you want a faster way to control harshness without endless EQ sweeps, Remasterify’s AI mastering can help. It analyzes your track’s frequency spectrum, pinpoints piercing highs, and applies dynamic adjustments automatically. This means you keep the sparkle in vocals or cymbals while removing the sting that causes listener fatigue. For DIY mixers, it’s a quick way to get a smooth, balanced tone without risking a dull mix.
Rebalance With Warmth
After reducing harshness, your mix might feel slightly dull. If that happens, add subtle warmth in the 200–500 Hz range. This brings back a natural, full-bodied tone without reintroducing the piercing highs you just removed.
Tips to Prevent These Issues in Future Mixes
To make sure over-EQing and harshness never creep back in, finish your mix with Remhttps://remasterify.com/asterify. Its AI mastering uses smart frequency balancing, dynamic EQ, and noise reduction to smooth sharp highs while keeping clarity. You can choose from different mastering intensities, apply stereo widening, or even match a reference track for consistency across songs. In minutes, you’ll have a polished, professional sound that plays great on any system.
Conclusion
Over-EQing and harsh frequencies may seem like similar problems, but they demand different solutions. Over-EQing is about too much processing, while harsh frequencies are about specific tonal spikes. Learning to hear the difference, and using the right tools for each will keep your mixes clean, natural, and listener-friendly.