If you’re stuck with audio meter readings, you’re in the right place to solve your loudness problems.
Here’s we figured out the common reasons why you landed up in this blog;
- Situation 1: Your track sounds quiet, but the audio meter tells it’s high.
- Situation 2: Your master is clipping though you have used a limiter.
- Situation 3: Your song sounds flat still when the LUFS and peak readings look fine.
Let me tell you that you’re not alone. There’s plenty of music creators who often get messed up with audio meter readings. Majority of them just observe the numbers but never open up the real loudness problems.
The truth is surface-level knowledge does not really help fixing the loudness problem in your audio.
So Here, we are going to break down how to use audio meters to catch loudness issues early, understand what each reading is telling you, and fix the problems before they ruin your final master.
What Audio Meters Actually Show You
Audio meters give you a visual read on what your ears may miss in the moment. They help you track how loud your signal is, how close it is to clipping, how balanced it feels over time, and whether your stereo image is behaving properly. That matters because a track can sound exciting for a few seconds and still be technically unstable underneath.
No single meter tells the whole story. Different meters are built to show different parts of the signal.
You can find these variances of audio meters;
| Peak meters show instant level spikes |
| True peak meters show peaks that can cause problems after encoding |
| RMS or VU meters show average energy |
| LUFS meters show perceived loudness over time |
| Spectrum analyzers show frequency balance |
| Phase meters show stereo and mono compatibility |
The goal is not to stare at meters all day. The goal is to use them to catch problems before they reach the final export.
Why Audio Meters Matter Before You Export
Audio meters matter because loudness problems often hide in plain sight. A track can feel loud in your room, then sound weak on streaming. It can peak safely on your master bus, then distort after uploading. It can hit decent numbers yet still feel harsh or flat.
That is why metering matters most right before exporting. It gives you one last objective check before your track leaves the session.
Audio meters help you catch:
- Clipping and overload risk
- Weak or inconsistent loudness
- True peak issues before streaming encoding
- Harsh limiter behavior
- Tonal imbalance
- Stereo width problems
Spotify’s normalization guidance makes this even more relevant. Spotify says playback is normalized to around -14 dB LUFS, leaves 1 dB of headroom for lossy encodings, and recommends keeping masters below -1 dB TP to avoid added distortion during transcoding. Spotify also notes that if a track is -20 dB LUFS with a -5 dBFS true peak, it may only be raised to -16 dB LUFS because of peak limits.
So meters are not just technical tools. They help you avoid bad decisions that can make a finished song sound weaker online.
The Main Types of Audio Meters You Need to Know
Peak meter
A peak meter shows the loudest instant moments in your signal. It is useful for spotting overload risk fast.
Use it when you want to know:
- whether a track is hitting the ceiling
- whether transients are too sharp
- whether the master bus is running too hot
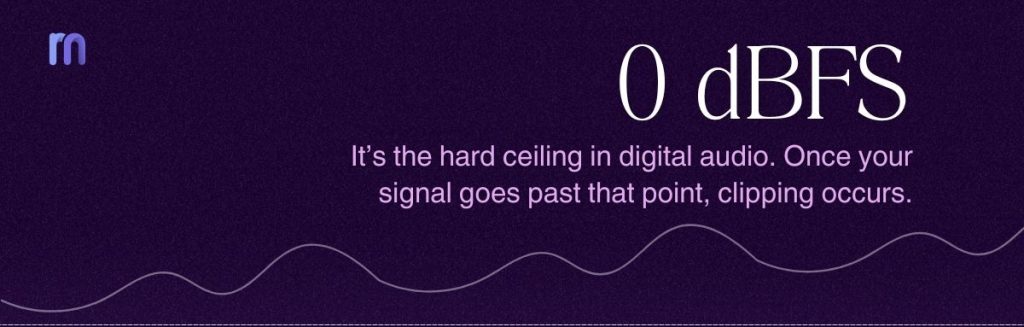
True peak meter
A true peak meter goes one step further. It estimates peaks that can happen between digital samples, especially after conversion or streaming encoding.
Use it when you want to:
- protect your master from hidden distortion
- prepare for streaming platforms
- keep final delivery cleaner
LUFS meter
LUFS measures perceived loudness over time. It is one of the most useful meters for modern mastering as it reflects how loud a track feels, not just how high the peaks go.
Watch:
- Integrated LUFS for overall loudness
- Short-term LUFS for section-by-section loudness
- Momentary LUFS for quick changes
LUFS vs Peak vs True Peak: What Each One Catches
This is where many creators get stuck. They see multiple numbers and assume they all mean the same thing. They do not.
Peak tells you how high the signal jumps.
True peak tells you how dangerous those peaks may become after conversion.
LUFS tells you how loud the track feels overall.
That means you can have:
- Healthy peaks but weak LUFS if the track lacks density
- Strong LUFS but risky true peak if the limiter is too aggressive
- Safe peak levels but harsh sound if the tonal balance is wrong
A good master usually needs all three to work together. Looking at only one meter often leads to bad fixes.
Master your songs using AI
Common Loudness Problems Audio Meters Can Catch
Meters become useful when you connect the reading to the actual problem. Having a proper knowledge of reading audio meters is necessary for doing so.
The track is too quiet overall
One of the most common issues is a track that feels too quiet, even when the meter shows activity. You may notice that the integrated LUFS stays low while the peak meter still moves a lot. That usually means the song has enough short spikes, but not enough sustained loudness to feel full and competitive.
This often happens when the mix has weak average energy.
It can also happen when there is too much dynamic separation between soft and loud parts, or when the track lacks enough compression and density to hold its loudness more consistently.
The true peak is too high
Sometimes your LUFS may already be close to the target, but the true peak is still sitting too high. This creates a risk because the track may run into problems during encoding or playback, even if it sounds acceptable inside your session.
In most cases, this points to a limiter problem. The output ceiling may be too high, the transients may be too sharp, or the limiter input may be pushed too aggressively. The track looks loud enough on paper, but it is not being controlled cleanly enough.
The track sounds loud but harsh
This is a very common mastering problem. The meter may suggest that the song is loud and competitive, yet the sound feels brittle, tiring, or unpleasant after a short listen.
In other words, the numbers look fine, but the listening experience does not.
That kind of harshness often comes from over-limiting, aggressive upper mids, too much saturation, or poor tonal balance. This is why audio meters should guide your decisions, not replace your ears.
Loudness changes too much between sections
A track can also feel uneven from section to section. The verse may sound weak, while the chorus suddenly jumps too hard. When that happens, the song feels unstable instead of smooth and intentional.
- Short-term LUFS is especially useful here because it reveals how loudness changes over time.
- Problems like this usually come from inconsistent arrangement density, level mismatches between sections, or dynamics that are not properly controlled.
Stereo width is causing translation issues
A mix can feel wide and exciting in stereo but still fall apart on other systems. This is where a phase meter becomes helpful. It can show whether widening choices are hurting mono compatibility and making the track less reliable across playback environments.
When this happens, the song may sound huge on headphones but collapse on speakers, phones, or mono playback. That is why loudness is not only about level. It is also about how well the track holds together everywhere.
Your meter has spotted the problem.
Now let Remasterify fix the loudness faster.
What Your Audio Meter Is Telling You to Fix
The meter is only useful if you know what action it points to. Try to understand what your meter is indicating for fixing.
If LUFS is too low 🔽
Your track may need more controlled density, not just more gain.
Try this:
- use gentle compression
- improve arrangement fullness
- reduce unnecessary transient spikes
- add limiting carefully
If true peak is too high 🔼
Do not just turn the limiter harder.
Try this:
- lower the output ceiling
- reduce sharp peaks earlier in the chain
- ease limiter input
- tame transient-heavy sounds
If the track feels loud but weak 🔽
This usually means the issue is not raw level. It is often balance, dynamics, or EQ.
Try this:
- fix frequency buildup
- strengthen low-end control
- reduce harshness
- improve section-to-section consistency
If the loudness changes too much 🔼
Look at short-term readings and compare sections.
Try this:
- automate levels
- adjust bus compression
- rebalance arrangement density
The important thing is this: meter readings do not tell you to chase numbers blindly. They tell you where the mix or master is fighting itself.
Why Meter Readings Alone Do Not Guarantee a Good Master
A track can hit the “right” LUFS and still sound bad. It can stay below a safe true peak and still feel weak. It can avoid clipping and still come across as small, harsh, or flat.
That is why meters should guide your decisions, not replace your ears.
Use meters to confirm:
- What you think you are hearing
- Where the problem starts
- Whether your fix is actually helping
But never assume a target number automatically means the song is finished.
Manual Meter Reading vs AI Mastering
Manual meter reading gives you control, but it also asks for time, judgment, and experience. You have to know what each reading means, what kind of problem it points to, and how to fix that problem without creating a new one.
That can be a lot for independent creators who just want a clean, release-ready result.
AI mastering changes the workflow. Instead of reading LUFS, true peak, dynamic range, and tonal issues one by one, you let the system analyze the full track and optimize the result more holistically.
| Factor | Manual Meter Reading | AI Mastering |
| How it works | You read LUFS, true peak, dynamic range, and other meter values yourself, then decide what needs fixing. | The system analyzes the full track for loudness, peaks, dynamics, and tonal issues, then applies broader improvements automatically. |
| Time required | Takes more time because you need to check readings one by one and make adjustments manually. | Faster because the analysis and correction happen in a more streamlined workflow. |
| Skill needed | Requires judgment, experience, and a good understanding of what each reading means. | Easier for creators who do not want to interpret every meter reading themselves. |
| Control level | Best when you want full control over every mastering decision. | Best when you want a simpler path to a cleaner result without handling every detail manually. |
| Risk of mistakes | Higher if you misread the meter or fix the wrong issue. One wrong move can create a new loudness problem. | Lower for everyday creators who want fewer loudness mistakes and a more guided process. |
| Best for | Creators who understand mastering well and enjoy technical tweaking. | Creators who want faster results, fewer loudness mistakes, and a cleaner, more balanced final master. |
Why Music Creators Use Remasterify After Checking Audio Meters
Audio meters are great at telling you that something is wrong. They are not always great at helping you fix it quickly.
That is where Remasterify fits naturally. Once you see loudness problems, true peak issues, or a weak final balance, the next need is not more numbers. The next need is a better result.
Remasterify is useful here because it is built around the exact outcomes metering is trying to protect:
- Cleaner loudness
- Safer peak control
- Better tonal consistency
- More balanced masters
- Stronger playback across platforms
So the workflow becomes much simpler:
- Use audio meters to catch the problem
- Use Remasterify to help fix the problem faster
- Export a track that feels more release-ready
Use audio meters to find where the audio issue is and then put your track to Remasterify to get it fixed. It’s a one-click process. Just upload your songs and then you can hear the differences by yourself.
Audio Metering FAQ
What audio meter matters most before export?
There is no single winner. Peak, true peak, and LUFS matter the most for loudness decisions, while spectrum and phase meters help with translation.
Is LUFS more important than peak?
Not exactly. LUFS tells you how loud the track feels. Peak tells you how high it jumps. You need both.
Why does my track hit good LUFS but still sound weak?
Because loudness is not only about level. Weak low end, poor dynamics, harsh EQ, and bad balance can all make a track feel smaller than the numbers suggest.
What is a safe true peak target?
For streaming-focused delivery, staying below -1 dB TP is a common safe target.
Can AI mastering fix loudness problems shown by audio meters?
It can often fix or improve the most common ones, especially when the issue is tied to loudness control, true peak management, tonal balance, or dynamic stability.
Create cleaner, more balanced, and release-ready master using AI
Remasterify is your go-to AI audio mastering platform.